
Introduction to Danish Butter Cookies
The nostalgia of homemade cookies
There's something magical about the aroma of fresh cookies wafting through the kitchen, instantly transporting you back to childhood. Danish Butter Cookies evoke memories of cozy family gatherings and carefree afternoons spent baking with loved ones. Whether you dipped them in your afternoon tea or simply savored them as a sweet treat, these cookies are a comforting reminder of home. As you prepare to make these delightful little bites, you'll find that each step is like a nostalgic trip down memory lane, bringing smiles to faces old and young alike.
Why Danish Butter Cookies are a must-try
These cookies are a must-try not just for their buttery flavor but also for their versatility. With a simple list of ingredients—like unsalted butter, sugar, and flour—you can create buttery, melt-in-your-mouth treasures. You might wonder, how does something so simple become so beloved? The answer lies in the technique and the sheer joy of piping them into beautiful shapes that catch the eye. Plus, they’re perfect for sharing! Whether you're making them for a holiday gathering or just for a cozy night in, Danish Butter Cookies are bound to impress. For a deep dive into the cultural significance of these cookies, check out resources like Scandinavia Food. Trust me, once you try making them at home, you'll understand why these cookies have a cherished spot in cookie tins everywhere.
Ingredients for Danish Butter Cookies
List of essential ingredients
Creating the perfect batch of Danish Butter Cookies requires just a handful of essential ingredients that work together harmoniously. Here's what you'll need:
- 1 cup unsalted butter (room temperature)
- ½ cup granulated sugar
- ¼ teaspoon salt
- 1 ½ teaspoons vanilla extract
- 1 egg
- 2 cups all-purpose flour
- Granulated sugar for sprinkling
These simple ingredients form the foundation for cookies that are rich, buttery, and undeniably delicious. Each element plays a crucial role in achieving that iconic taste and texture we're all familiar with!
The importance of quality butter
When it comes to Danish Butter Cookies, the most important ingredient is undoubtedly the butter. The flavor and texture of your cookies can drastically change based on the quality of butter you choose. I highly recommend using a high-quality unsalted butter, like Kerrygold, known for its rich, creamy taste.
Good butter not only adds flavor but also contributes to the cookies' melt-in-your-mouth texture. So, don't skimp on this vital ingredient—after all, better butter means better cookies!
Preparing Danish Butter Cookies
Making Danish Butter Cookies is a delightful experience that transports your taste buds straight to the charming bakeries of Denmark. This recipe is straightforward and perfect for both seasoned bakers and beginners alike. Let’s dive into the steps you need to take to create these irresistible treats!
Gather Your Ingredients
The first step in preparing delicious Danish Butter Cookies is to gather all your ingredients. Here’s what you’ll need:
- 1 cup unsalted butter, at room temperature
- ½ cup granulated sugar
- ¼ teaspoon salt
- 1 ½ teaspoons vanilla extract
- 1 egg
- 2 cups all-purpose flour
- Extra granulated sugar for sprinkling
You’ll want to make sure your butter is soft enough to cream easily. Also, using high-quality butter like Kerrygold can elevate the flavor of your cookies!
Creaming the Butter and Sugar
Now that you have your ingredients ready, it’s time to start the magic. In a mixing bowl, beat the unsalted butter and sugar together on medium speed. You want to aim for a fluffy, creamy consistency—this usually takes about 1 to 2 minutes.
Once combined, add in the salt, vanilla extract, and the egg. Continue to mix until everything is well incorporated, taking about a minute. At this stage, the mixture should be light and airy, which will help your cookies have that melt-in-your-mouth quality.
Mixing in the Remaining Ingredients
Next, reduce the mixer speed to low and gradually add the all-purpose flour. Mix just until mostly combined to avoid overworking the dough. Take a moment to finish mixing with a rubber spatula, ensuring that all the flour is fully incorporated. The dough will be quite thick, which is exactly what you want for piping!
Transfer Dough to Piping Bag
To achieve those beautiful shapes characteristic of Danish Butter Cookies, transfer your dough into a piping bag fitted with a large open-star tip. If you don’t have a piping bag, a zip-top bag with a corner snipped off will work just as well. This allows for easy shaping of your cookies into delightful circles.
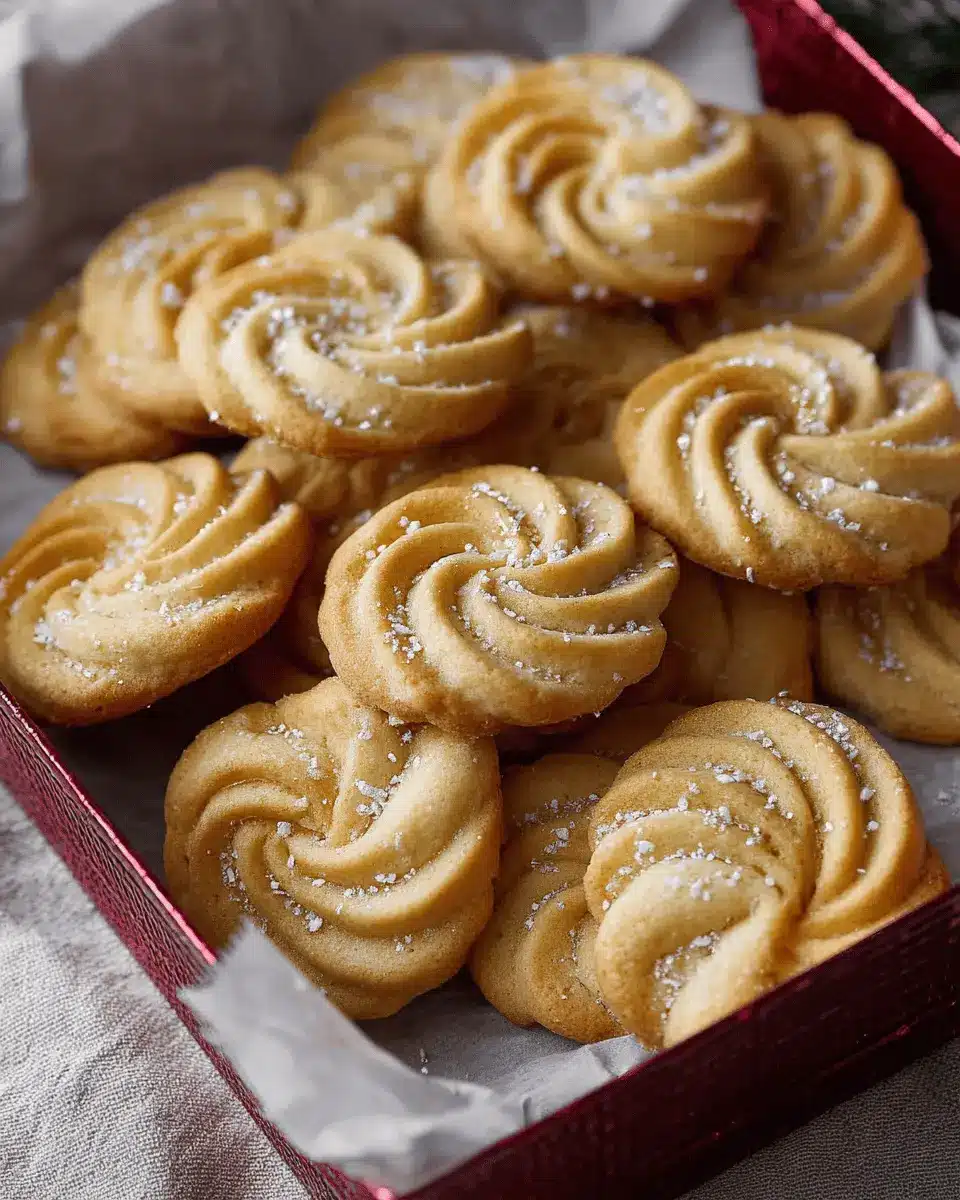
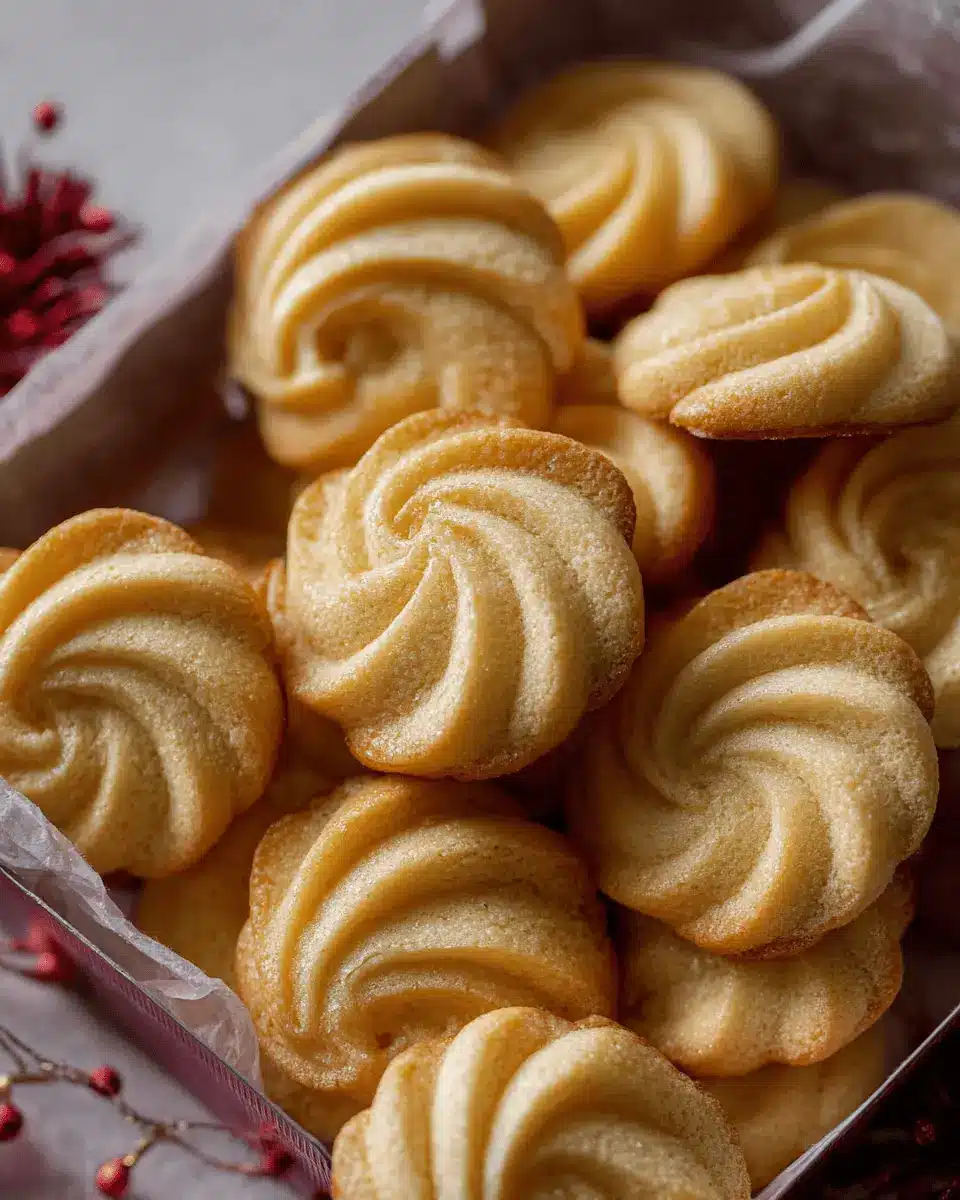
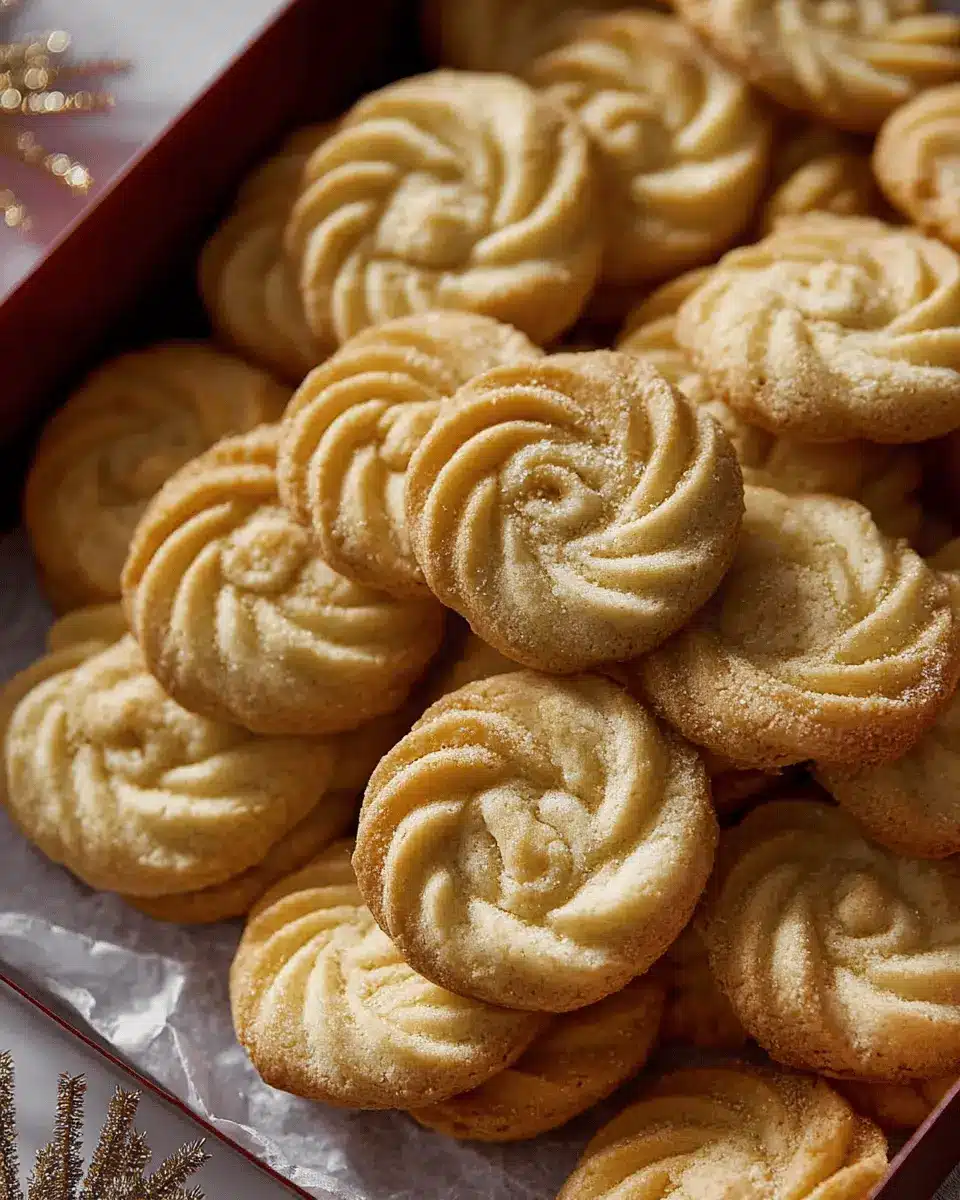
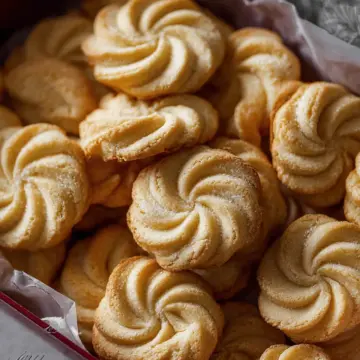
Pipe and Sprinkle the Cookies
On a baking sheet lined with parchment paper or silicone baking mats, pipe the dough into 2-inch circles. Feel free to be creative here; you can even try different shapes if you’re feeling adventurous! Once piped, sprinkle a little granulated sugar on top for that extra touch of sweetness and crunch.
Baking to Perfection
Now, preheat your oven to 350 degrees F, and prepare to bake those beauties! Place your baking sheet in the oven and bake for about 15 to 17 minutes or until they are just lightly golden brown on the edges. It’s essential to let them cool completely before indulging, as this helps the cookies firm up.
With a few simple steps, you'll have a batch of Danish Butter Cookies that are sure to impress friends and family. So go ahead, embrace the joy of baking these delightful cookies—your taste buds will thank you!
Variations on Danish Butter Cookies
Adding chocolate chips
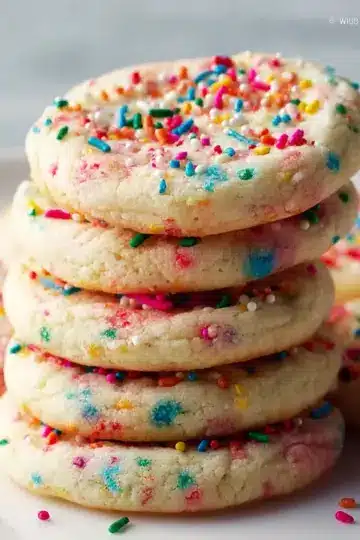
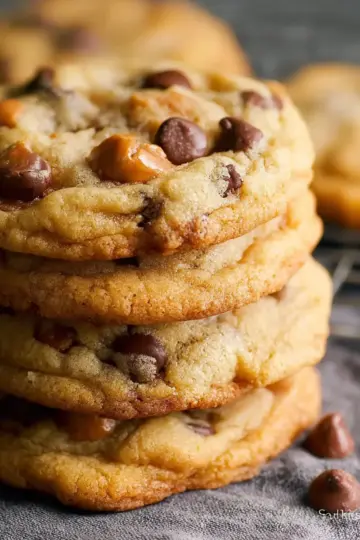
For a delicious twist on classic Danish Butter Cookies, try folding in some chocolate chips. You can use semi-sweet, dark, or even white chocolate to satisfy your sweet tooth. Just add about 1 cup of chocolate chips to the batter before piping. Baking these flavorful cookies will not only fill your kitchen with mouthwatering aromas but will also provide an exciting surprise with every bite.
Experimenting with different extracts
Why stick to vanilla when you're making your Danish Butter Cookies? Get creative by experimenting with various extracts! Almond extract adds a lovely nutty touch, while lemon or orange extracts can brighten the flavor profile. Aim for ½ teaspoon of flavorful extract to infuse your cookies with aromatic sweetness. These small adjustments can elevate your cookies and keep your baking routine fresh and fun.
Whether you're planning a coffee date or simply indulging yourself, these variations will surely impress!
Baking Notes for Danish Butter Cookies
Tips for Perfect Piping
To achieve beautifully shaped Danish Butter Cookies, use a sturdy piping bag fitted with a large star tip, like the Ateco #827. Ensure your dough is soft but not overly warm, which can make piping tricky. Start by squeezing some dough onto the parchment, lifting your hand while squeezing outwards to form the desired shape. Practice on a piece of parchment first if you're unsure—you'll find your rhythm!
Storage Tips to Maintain Freshness
For the best flavor and texture, store your Danish Butter Cookies in an airtight container at room temperature for up to one week. If you want to keep them longer, they freeze beautifully for up to three months! Just make sure to layer them with parchment paper to prevent sticking. When you're ready to eat, let them thaw at room temperature for the best taste experience.
Serving suggestions for Danish Butter Cookies
Pairing with Coffee or Tea
There’s something truly delightful about enjoying Danish Butter Cookies alongside a warm cup of coffee or tea. The rich, buttery flavor of these cookies complements the bold notes of coffee perfectly, creating a harmonious balance. For a sweeter pairing, a smooth herbal tea can enhance the delicate flavors of the cookies. This cozy combination is ideal for weekend brunches or relaxing afternoons. If you're looking for something special, consider brewing a chai latte or matcha tea to elevate the experience!
Creative Packaging for Gifting
Looking for a unique gift idea? These stunning Danish Butter Cookies are perfect for gifting! Consider packing them in a decorative tin or a clear cellophane bag tied with a beautiful ribbon. You could even personalize the packaging with handwritten labels or tags featuring your favorite cookie quote. If you’re feeling crafty, you might try painting a small box or using stencils for a lovely, customized touch. This thoughtful presentation not only showcases your baking skills but also adds a personal touch that friends and family will appreciate.
Time Details for Danish Butter Cookies
Preparing these Danish Butter Cookies is a delightful activity that you’ll enjoy from beginning to end. Let's break down the timing:
Preparation Time
You'll need about 30 minutes to gather your ingredients, mix everything together, and prepare for baking. Don't forget to take your unsalted butter out beforehand so it can reach room temperature for optimal mixing!
Baking Time
The cookies bake for 15 to 17 minutes. Keep an eye on them to ensure they turn that beautiful light golden brown. A reliable oven thermometer can help with accuracy!
Total Time
From start to finish, you're looking at just 45 minutes to have these scrumptious cookies ready for your taste buds. And trust me, they’re well worth every second! For more tips on timing, check out Baking Basics.
With these precise time details, you’ll be ready to enjoy the wonderful process of making your own Danish Butter Cookies. Happy baking!
Nutritional Information for Danish Butter Cookies
Calories Per Cookie
Each delightful Danish butter cookie contains approximately 83 calories. This makes them a perfect little treat for indulging your sweet tooth without feeling overly guilty.
Key Nutritional Highlights
- Carbohydrates: 8g
- Fat: 5g (of which saturated fat is 3g)
- Cholesterol: 18mg
- Sodium: 18mg
- Sugar: 2g
These cookies are rich in flavor thanks to the butter, yet they're reasonable in calories, making them a great choice for dessert lovers. With moderate carbohydrates and fat, they can fit into a balanced diet. For more insights on maintaining healthy eating habits, you might find useful information on reputable nutrition sites like Healthline and The American Heart Association. Enjoy your Danish butter cookies as a delightful addition to your dessert table!
FAQs about Danish Butter Cookies
Can I freeze the dough?
Absolutely! Freezing your Danish Butter Cookies dough is a great way to prepare in advance. Simply wrap the dough tightly in plastic wrap or store it in an airtight container. It can last in the freezer for up to three months. When you’re ready to bake, just let it thaw in the fridge for a few hours before piping and baking.
How long do the cookies stay fresh?
Once baked, these delightful cookies can remain fresh for about one week when stored properly. They’re best enjoyed within the first few days, but if you have leftovers, don’t worry—you can still savor them!
What’s the best way to store them?
To keep your Danish Butter Cookies fresh, store them in an airtight container at room temperature. This will prevent them from getting stale or losing their delightful texture. For longer storage, consider freezing them in a single layer before transferring to a container; they’ll hold up perfectly for future enjoyment!
If you're interested in more tips on storing baked goods, check out this helpful guide.
Conclusion on Danish Butter Cookies
Embracing the joy of homemade treats
Making Danish Butter Cookies not only fills your kitchen with delightful aromas but also brings a sense of accomplishment. Each bite of these buttery, melt-in-your-mouth cookies invites nostalgia and warmth. So grab your ingredients and share the joy—there’s nothing quite like homemade treats to brighten your day!
Danish Butter Cookies
Equipment
- oven
- baking sheets
- parchment paper
- decorating bag
- large open star tip
Ingredients
Base Ingredients
- 1 cup unsalted butter room temperature
- 0.5 cup granulated sugar
- 0.25 teaspoon salt
- 1.5 teaspoons vanilla extract
- 1 large egg
- 2 cups all-purpose flour
- to taste table spoon granulated sugar for sprinkling
Instructions
Preparation Steps
- Preheat oven to 350 degrees F. Line two baking sheets with parchment paper or silicone baking mats.
- Beat the butter and sugar on medium speed until combined and fluffy, about 1 to 2 minutes. Add the salt, vanilla and egg, and beat until combined, about 1 minute. Reduce speed to low and gradually add the flour until mostly combined. Give a final few stirs with a rubber spatula to incorporate the flour.
- Transfer the dough to a decorating bag fitted with a large open star tip. Pipe the dough into 2-inch circles on the parchment paper or silicone baking mats. Sprinkle with sugar.
- Bake, one pan at a time, until light golden brown, about 15 to 17 minutes. Allow to cool completely before storing or serving.
Leave a Reply