
Introduction to Easy Banana Pudding
Banana pudding is one of those comforting desserts that reignites fond memories of family gatherings and summer picnics. Its layers of creamy goodness, sweet bananas, and crunchy vanilla wafers make it a staple in many Southern homes. The delightful combination of textures and flavors creates a satisfying experience with every spoonful.
But why specifically is banana pudding so beloved? For starters, it’s incredibly simple to make—perfect for those busy weekdays or unexpected guests. The versatility of this dessert allows you to easily adapt it, swapping in your favorite ingredients or even dressing it up with a touch of chocolate or peanut butter for a fun twist.
Moreover, banana pudding speaks to nostalgia in a big way. Many of us grew up with a beloved relative crafting this timeless dessert, and every taste brings back sweet memories. Whether enjoyed at a backyard barbecue or served at a family holiday, its presence brings people together. For a modern take, this easy banana pudding recipe is a no-bake option, allowing you to whip it up in no time while still delivering that comforting flavor you know and love.
Before we dive into the specifics of the recipe, consider checking out Southern Living for more ideas to elevate your dessert game!
Ingredients for Easy Banana Pudding
Essential ingredients for the classic taste
Creating a delicious easy banana pudding starts with a few key ingredients that define the classic Southern dessert:
- Vanilla Wafer Cookies: The heart of your pudding, they add texture and sweetness. One box (11 ounces) will suffice.
- Instant Vanilla Pudding Mix: A small (3.4-ounce) box provides that creamy base—just mix it with 2 cups of milk.
- Ripe Bananas: Aim for 3-4 large bananas, as they offer the best flavor. Feel free to slice extra ones for garnish!
- Whipped Topping: An 8-ounce container of thawed frozen whipped topping gives your pudding its light, airy finish.
For more tips, you can visit sites like Food Network for delightful dessert ideas.
Alternatives for customization
Looking to switch things up? Here are some fun alternatives:
- Homemade Whipped Cream: Swap the commercial topping for freshly whipped cream for a more natural touch.
- Flavored Pudding: Try chocolate or butterscotch pudding for a twist on the classic.
- Nutty Additions: Chopped walnuts or pecans can add crunch and depth to your layers.
This way, every serving of your easy banana pudding can be a unique experience. What’s your personal favorite way to remix this classic?
Preparing Easy Banana Pudding
Banana pudding is an all-time favorite dessert that effortlessly combines creamy, sweet layers with a delightful crunch. It’s the kind of dessert that feels like a warm hug, perfect for any gathering or a simple night in. Here’s how to make it in a few easy steps.
Gather Your Ingredients and Tools
Before you start crafting your delicious easy banana pudding, make sure you have all the necessary ingredients and tools at your fingertips. You’ll need:
-
Ingredients:
-
1 (11 ounce) box of vanilla wafer cookies
-
1 (3.4 ounce) box of vanilla instant pudding mix (plus 2 cups milk)
-
3-4 large ripe bananas, thinly sliced (plus some for garnish)
-
1 (8 ounce) container of frozen whipped topping, thawed
-
Tools:
-
An 11 x 7-inch baking dish
-
Mixing bowl
-
Spatula for spreading and layering
Don’t forget to find a comfy spot in your kitchen to assemble your easy banana pudding masterpiece!
Prepare the Vanilla Pudding Mix
The first step is to whip up your vanilla pudding. Follow the package instructions for the instant pudding mix, combining it with the specified amount of milk until it thickens. This part only takes a few minutes, but it’s crucial to let your pudding set in the refrigerator for about 5 minutes before you start layering; this will help it hold its shape when you build your dessert. After all, no one likes a pudding that’s too runny!
Layer the Vanilla Wafers
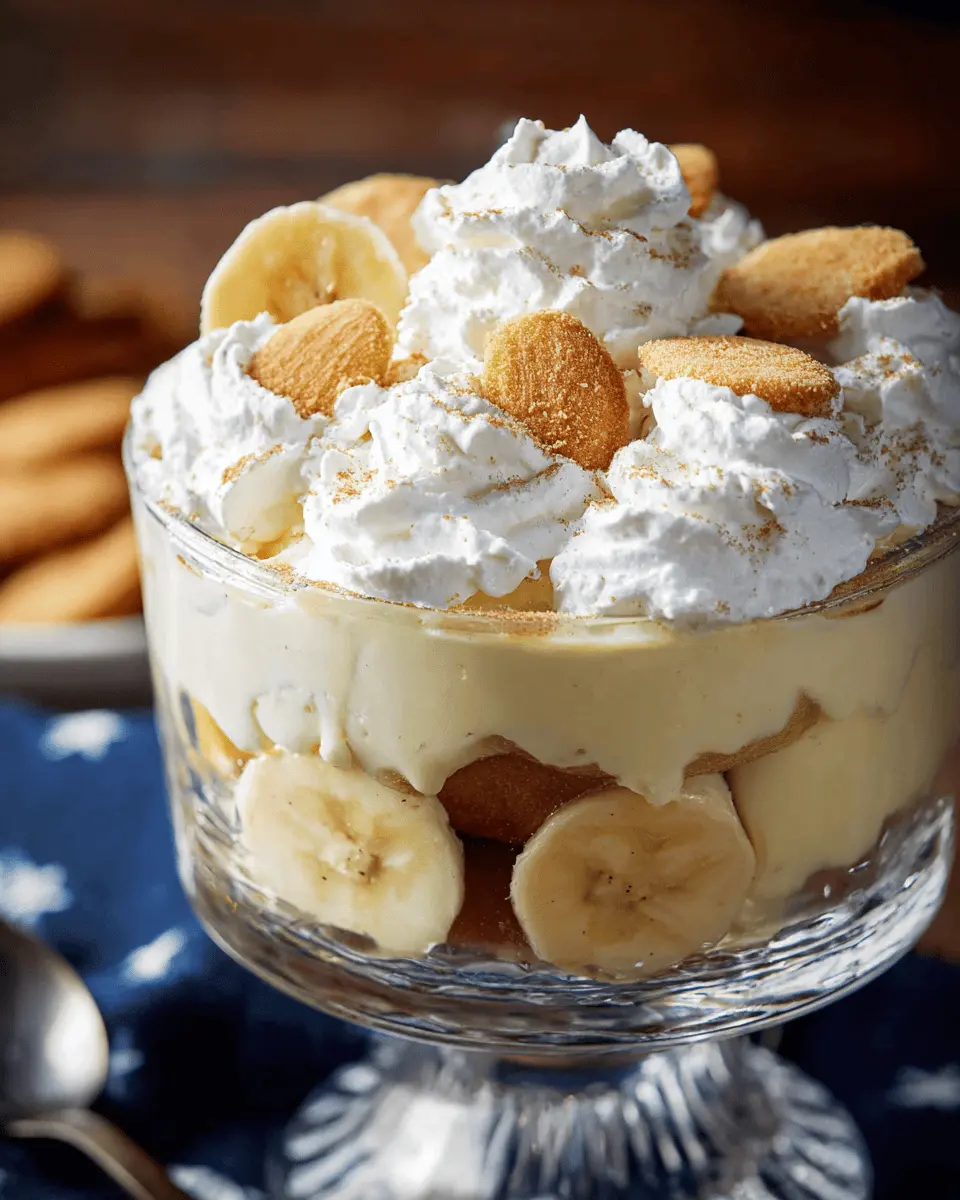
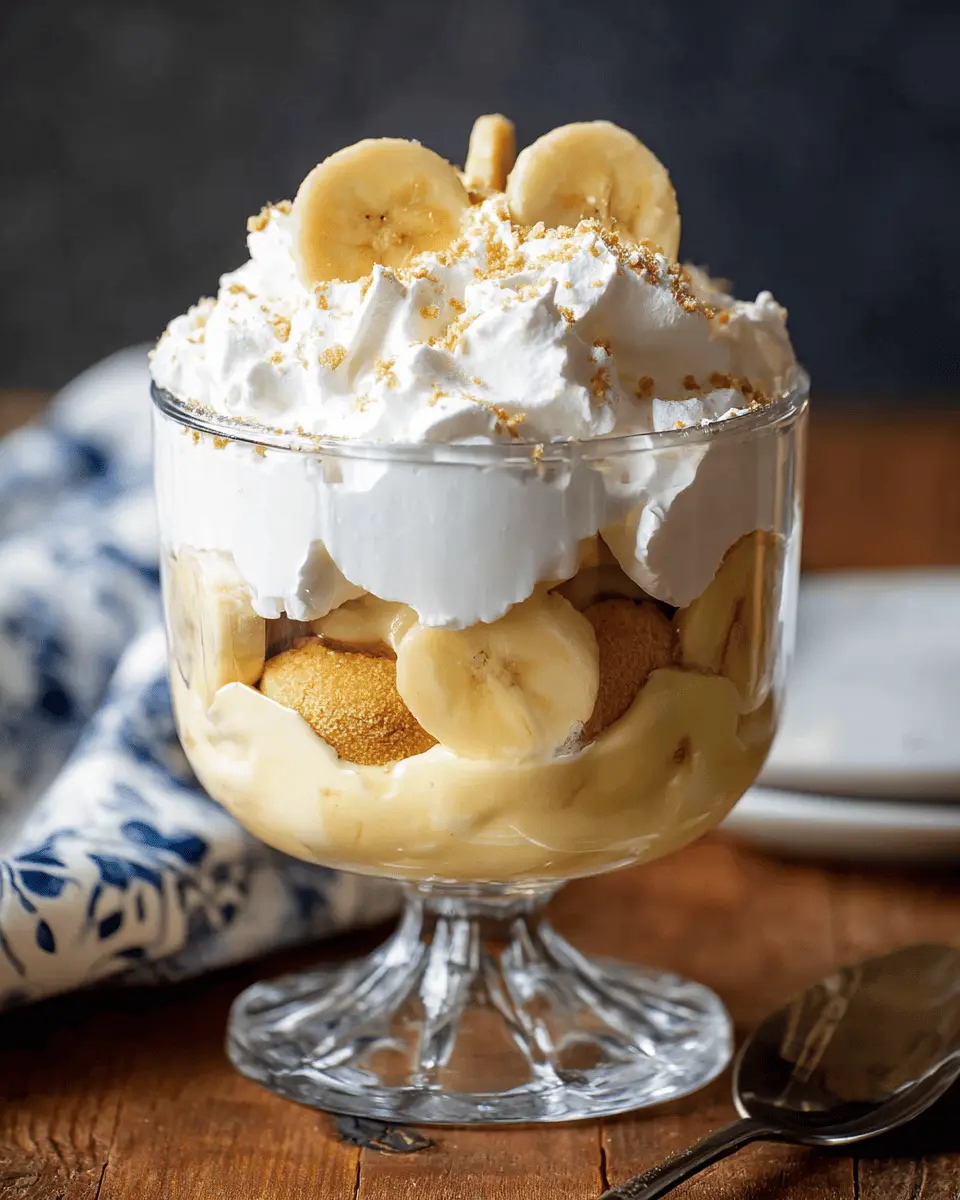
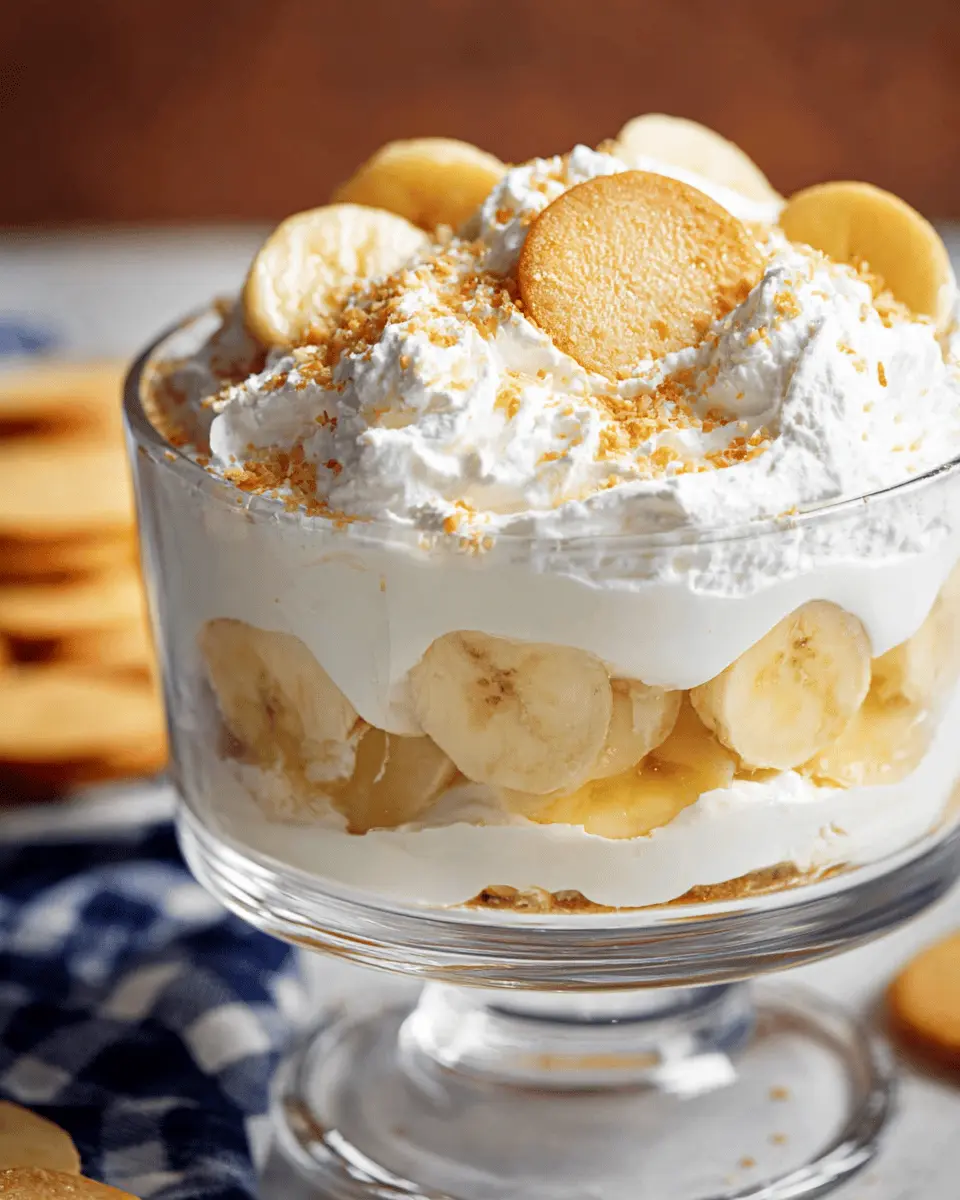
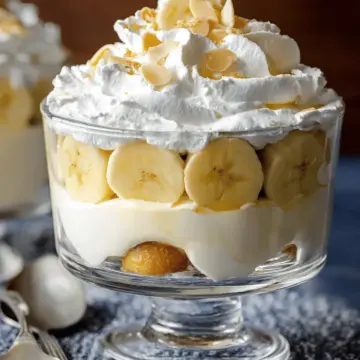
Once your pudding has set, it’s time to create a base with the vanilla wafers. Arrange them in a single layer along the bottom of your baking dish. Aim for about 24 cookies per layer, but feel free to adjust based on your style! It's all about that perfect balance of cookies and creaminess.
Add Banana Slices
Now for the fun part—layering those banana slices! Place a generous layer of the thinly sliced bananas over the vanilla wafers. Not only will this add flavor and texture, but the bananas will also provide a beautiful contrast to the creamy pudding. You can never go wrong with the deliciousness of ripe bananas in this easy banana pudding recipe.
Top It with Whipped Topping
Finally, the last step is to bring it all together with a cloud of whipped topping. Spread it evenly over your banana layer, making sure to cover every nook and cranny. For an extra touch, save a few banana slices and some wafer cookies to sprinkle on top as a garnish.
Once you’ve finished layering, cover your dish with plastic wrap and refrigerate it for at least 4 hours—or preferably overnight—for the best flavor. Trust me, the wait will be worth it!
If you're looking for variations or want to explore more dessert ideas, check out this recipe collection that can inspire your next flavorful venture!
Enjoy your delicious homemade easy banana pudding!
Variations on Easy Banana Pudding
Chocolate Banana Pudding Twist
If you’re a chocolate lover, this variation on easy banana pudding is a must-try! Simply mix in a box of chocolate instant pudding with the vanilla pudding for a delightful twist. Layer as usual, but sprinkle some chocolate shavings or mini chocolate chips over the top for extra indulgence. This rich, creamy delight is sure to satisfy any sweet tooth!
Nutty Banana Pudding Addition
For a bit of crunch, consider adding some chopped nuts, like pecans or walnuts, into your easy banana pudding. Mix them into the pudding layers or sprinkle them atop the whipped topping. Not only does it enhance the texture, but it also adds a delicious nutty flavor that complements the bananas beautifully. This simple tweak will elevate your dessert game!
For more creative dessert ideas, check out this fantastic resource on pudding variations.
Cooking tips and notes for Easy Banana Pudding
Tips for perfect layering
To achieve the perfect layering in your easy banana pudding, start with a single layer of vanilla wafer cookies, making sure they are closely packed. For added flavor, consider lightly pressing the cookies down before adding the pudding. Alternate between pudding and banana slices for a harmonious blend of flavors and textures. Remember, the key is to have a balance of creamy and crunchy in every bite.
Essential chilling time advice
Chilling your easy banana pudding is crucial! Aim for at least four hours, but overnight is even better—this allows the flavors to meld perfectly and the dessert to set. For best results, cover the dish tightly with plastic wrap to prevent any unwanted air, ensuring your pudding stays fresh and delicious. Trust the process; the wait will be worth it!
Serving suggestions for Easy Banana Pudding
Garnishing ideas for a stunning presentation
To elevate your easy banana pudding and wow your guests, garnishing is key. Try these ideas for a delightful finish:
- Fresh Banana Slices: Add a few vibrant banana slices on top right before serving to keep them from browning.
- Crushed Vanilla Wafers: Sprinkle crushed wafers for a crunchy texture contrast.
- Chocolate Shavings: For a touch of decadence, garnish with chocolate shavings or mini chocolate chips.
- Mint Leaves: A few fresh mint leaves can add a pop of color and freshness.
Pairing suggestions to elevate the experience
Make your easy banana pudding even more enjoyable by pairing it with complementary flavors:
- Coffee: A hot cup of coffee enhances the sweetness of the pudding, creating a lovely after-dinner treat.
- Fruit Salad: Serve alongside a refreshing fruit salad to balance the creamy texture of the pudding.
- Herbal Tea: A calming herbal tea can offer a soothing companion to your dessert.
For more pairing ideas, check out this fruit pairing guide. Enjoy this delightful combination with family and friends!
Time Breakdown for Easy Banana Pudding
Preparation Time
Getting started on your easy banana pudding is a breeze! You’ll need just 15 minutes to gather your ingredients and whip up the vanilla pudding. It’s a quick and stress-free process that even a kitchen novice can tackle with confidence.
Chilling Time
Once you've assembled your masterpiece, it’s time for the easy banana pudding to chill. Pop it in the fridge for at least 4 hours. This ensures that the flavors meld beautifully, and the dessert sets up nicely. You can even let it chill overnight for maximum flavor!
Total Time
In total, you’re looking at 4 hours and 15 minutes from start to finish. Most of that time is just waiting for it to chill, so you can easily go about your day while this delightful dessert comes together on its own.
For more dessert ideas, you might want to check out sources like Bon Appétit or Food Network for even more inspiration!
Nutritional Facts for Easy Banana Pudding
When you're craving a delightful dessert, it helps to know what you're treating yourself to. Here’s a handy nutritional breakdown of this easy banana pudding per serving:
Calories
Each serving contains about 287 calories, making it a satisfying, sweet indulgence without breaking the calorie bank.
Protein
You’ll get roughly 4 grams of protein in every serving, thanks to the combination of pudding and whipped topping, helping you feel a bit fuller.
Sodium
This easy banana pudding has about 240 milligrams of sodium, which is fairly moderate, allowing you to enjoy the flavors without worrying too much about your daily intake.
For more detailed nutritional information, consider checking resources like the USDA FoodData Central or NutritionData. These can provide insights into specific dietary needs as well!
FAQs about Easy Banana Pudding
Can I make easy banana pudding ahead of time?
Absolutely! One of the best things about easy banana pudding is that it’s a fantastic make-ahead dessert. You can prepare it the day before and let it chill overnight in the refrigerator. This not only helps the flavors meld beautifully but also saves you time on the day of your gathering. Just remember to cover it tightly with plastic wrap to keep it fresh!
How long can leftovers be stored?
If you’re lucky enough to have leftovers (which is rare), you can store your easy banana pudding in an airtight container in the fridge for up to three days. After that, the bananas may start to brown, and the texture might not be quite as delightful.
What can I use instead of vanilla wafers?
If you want to switch things up, consider using graham crackers or shortbread cookies as substitutes for vanilla wafers. Both options add a delightful crunch and unique flavor to your easy banana pudding. For a gluten-free option, look for gluten-free cookie varieties!
If you're interested in learning more about banana pudding variations, feel free to check out this banana pudding guide!
Conclusion on Easy Banana Pudding
In summary, this easy banana pudding is a delightful and nostalgic treat that requires minimal effort. Whether you're hosting a gathering or enjoying a quiet evening at home, this semi-homemade dessert brings comfort and smiles. With just a few ingredients and a bit of patience, you can create a creamy delight that everyone will love. Perfect for any occasion, it's a recipe you'll want to keep handy. Enjoy the sweet simplicity!
Easy Banana Pudding
Equipment
- 11 x 7 inch dish
Ingredients
- 1 box vanilla wafer cookies 11 ounce
- 1 box vanilla instant pudding mix 3.4 ounce (4-serving), plus 2 cups of milk
- 3-4 large ripe bananas thinly sliced plus extra for garnish
- 1 container frozen whipped topping 8 ounce, thawed
Instructions
- Prepare the pudding according to the package instructions. Refrigerate and set aside.
- Arrange vanilla wafer cookies in a single layer on the bottom of an 11 x 7-inch baking dish. Use a spatula to spread half of the prepared pudding (approximately 1 cup) over the cookies. Top the pudding with a single layer of banana slices. Repeat the layers, starting with cookies.
- Top the final layer of banana slices with whipped topping. Refrigerate for at least 4 hours (or overnight).
- Just before serving, garnish with extra vanilla wafers and sliced banana, if desired.

Leave a Reply