
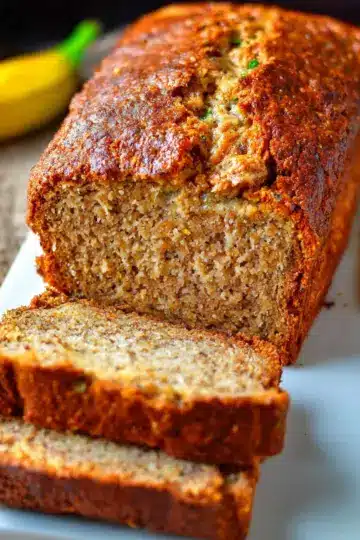
Introduction to Honey Walnut Banana Bread
Why Banana Bread is a Beloved Treat
Banana bread has earned its status as a classic comfort food for good reason. For many, it brings back memories of cozy mornings and family gatherings. The rich aroma of bananas baking in the oven can instantly transport you to simpler times, where the only concern was whether to spread a little butter or slather on some peanut butter.
Packed with naturally sweet ripe bananas, this delightful bread not only satisfies your sweet tooth but also provides nutritional benefits. Bananas are a great source of potassium, fiber, and vitamins, making them a healthy addition to any diet. Plus, they’re a wonderful way to use up overripe bananas that might otherwise go to waste.
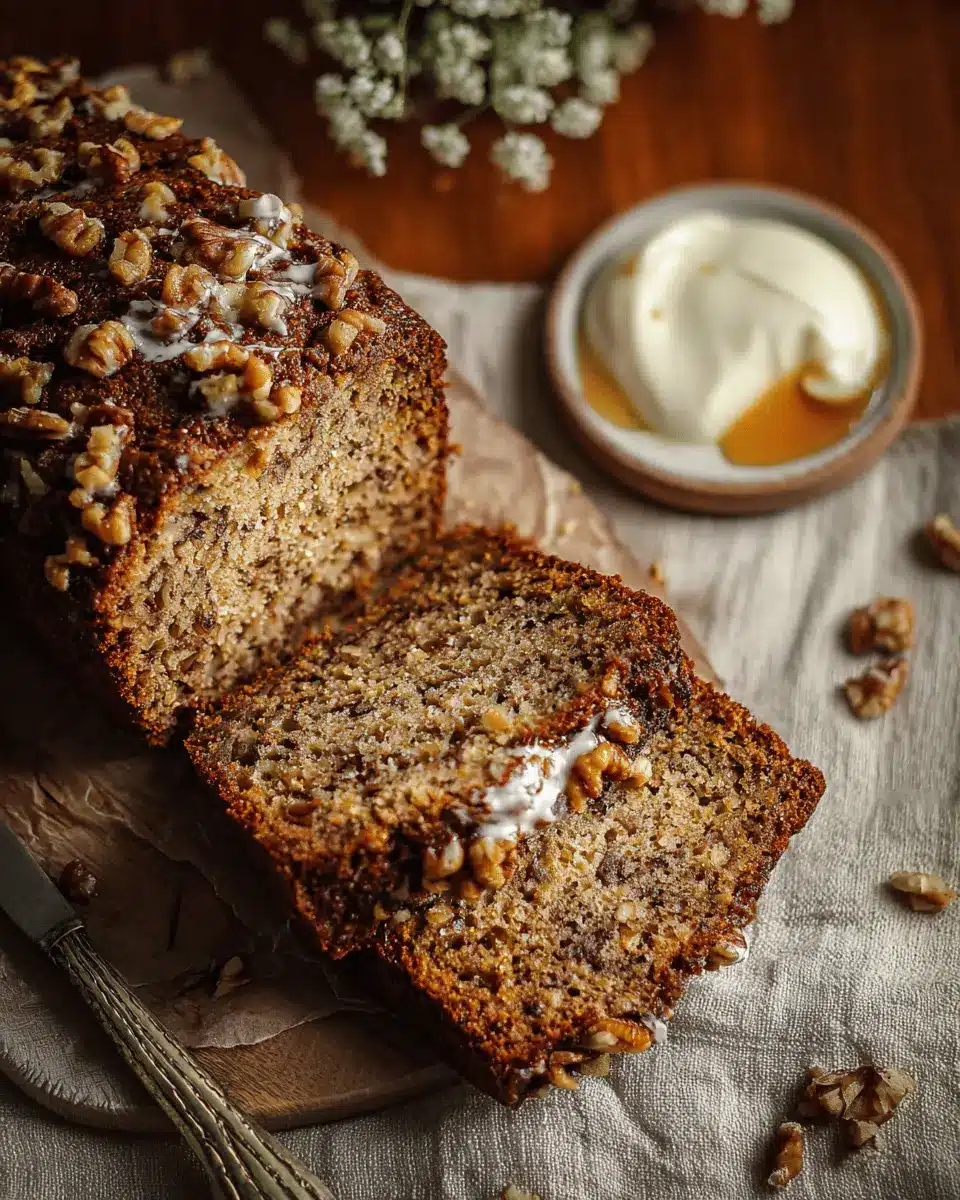
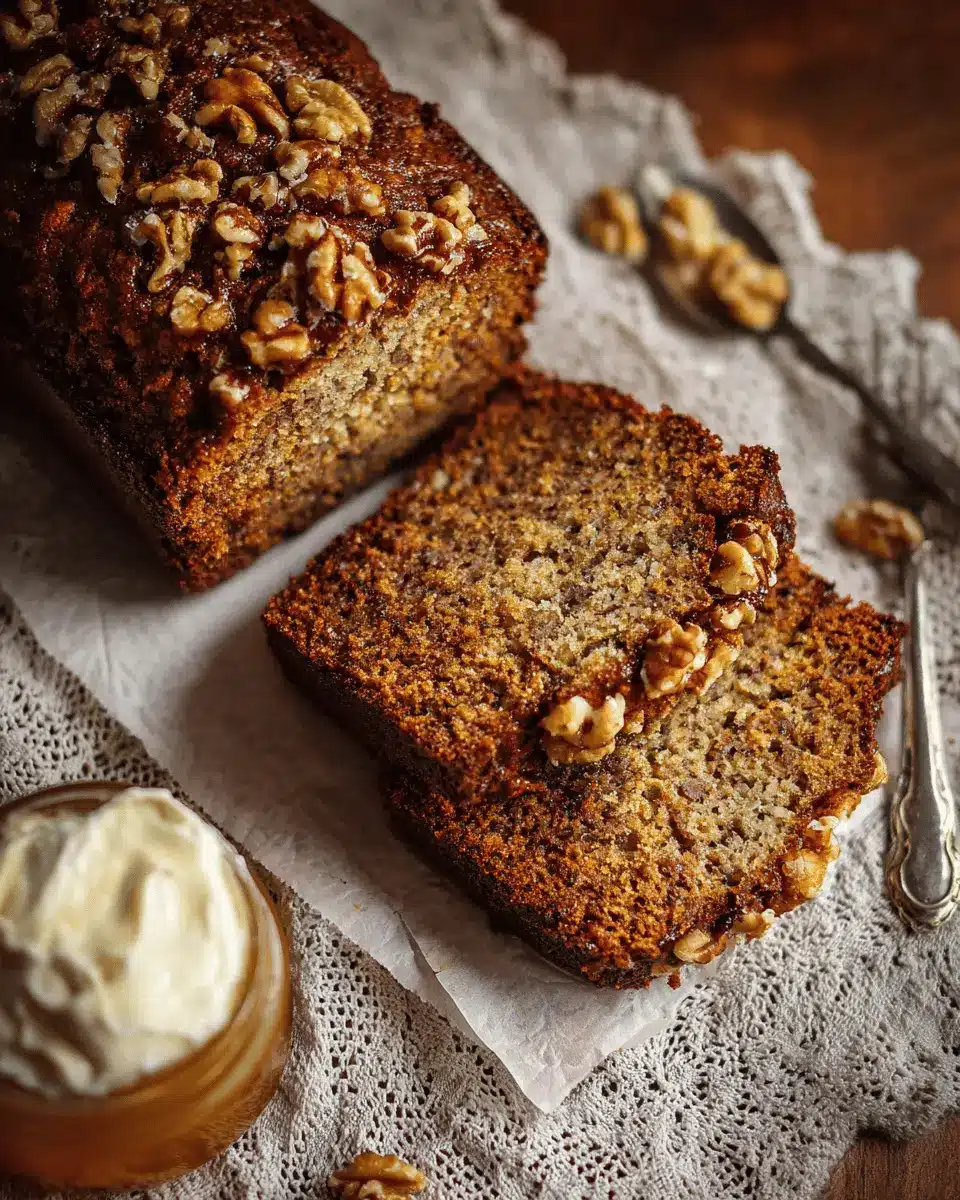
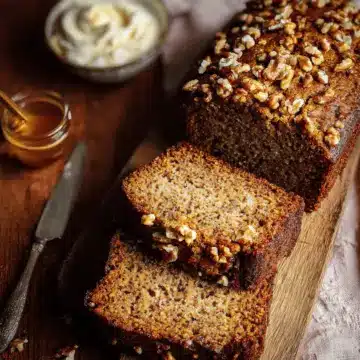
Our Honey Walnut Banana Bread elevates this beloved treat with the addition of a luscious honey and walnut topping that adds a toasty crunch and a hint of sweetness. It's perfect for breakfast, brunch, or as an afternoon snack. As you bake, the combination of honey and walnuts mingles with the cake-like texture of the banana bread, creating an irresistible aroma that fills your kitchen.
If you’re ready to enjoy a slice of comfort and nostalgia, let’s dive into this recipe!
Ingredients for Honey Walnut Banana Bread
When it comes to making a delightful honey walnut banana bread, having the right ingredients is key. Here’s a breakdown that will set you on the path to baking perfection.
Essential ingredients for the banana bread
To create your loaf, you'll need:
- 2 cups Unbleached All-Purpose Flour: This gives the bread its structure.
- 1 teaspoon Baking Soda: For that perfect rise.
- 1 teaspoon Baking Powder: Adds fluffiness to your loaf.
- ½ teaspoon Salt: Enhances the flavors.
- 1½ cups Ripe Bananas (about 3 bananas): The star ingredient for moisture and sweetness.
- 2 Large Eggs: Binding agents that bring the mixture together.
- ¾ cup Sugar: A touch of sweetness to balance the flavors.
- ½ cup Avocado Oil: For a moist and tender crumb.
Honey walnut topping ingredients
For the sweet topping that makes this bread unforgettable, gather:
- ½ cup Honey: Adds a burst of natural sweetness.
- 1 cup Chopped Walnuts: These give a delightful crunch and a nutritious boost, packed with omega-3 fatty acids.
Now that you know what you need, are you as excited to bake this honey walnut banana bread as I am? Trust me, it’s going to be worth every bite! If you're looking for similar recipes or ingredient tips, check out Serious Eats or consult Bon Appétit for unique twists on classic breads.
Preparing Honey Walnut Banana Bread
Making your own honey walnut banana bread can be a delightful experience, perfect for brightening up any morning or snack time. Let’s walk through the preparation step by step to ensure your baking adventure is both enjoyable and successful!
Gather Your Equipment
Before diving in, collecting your equipment is key to a seamless baking experience. You’ll need:
- Loaf Pan: A standard 9x5 inch pan works best.
- Parchment Paper: This will help you easily lift the loaf out of the pan once it has cooled.
Having your tools ready will make the process smoother!
Preheat the Oven and Prepare the Loaf Pan
Start by preheating your oven to 350°F (175°C). While it's warming up, prepare your loaf pan by lightly greasing it with some avocado oil. Then, line the bottom with a strip of parchment paper, allowing enough to extend over the sides. This nifty trick will help you remove your honey walnut banana bread effortlessly later on.
Mix the Dry Ingredients
In a large mixing bowl, sift together your dry ingredients:
- 2 cups Unbleached All-Purpose Flour
- 1 teaspoon Baking Soda
- 1 teaspoon Baking Powder
- ½ teaspoon Salt
Mixing these ingredients ensures even distribution of the leavening agents, which is crucial for a fluffy loaf.
Combine the Wet Ingredients
In a separate medium bowl, mash 1½ cups of ripe bananas (that’s about three bananas), and then add:
- 2 Large Eggs
- ¾ cup Sugar
- ½ cup Avocado Oil
Stir until well combined. It’s always a good idea to whisk until no clumps remain, as this will lead to a more cohesive batter.
Incorporate Wet and Dry Ingredients
Now, it’s time for the fun part! Slowly fold the wet mixture into the dry ingredients using a wooden spoon. Mix until you just see everything come together—in other words, don’t over-mix! A few lumps are perfectly fine.
Add the Honey Walnut Topping
For that sweet, crunchy finish, prepare the honey walnut topping by combining ½ cup honey with 1 cup of chopped walnuts in a small bowl. Spoon this delightful mixture over the top of your batter in the loaf pan.
Bake to Perfection
Place your loaf pan on the middle rack of the oven. After about 30 minutes, cover the top with a sheet of aluminum foil to prevent it from browning too quickly. Continue baking for about an hour, checking for doneness with a toothpick or knife—if it comes out clean, you’re all set!
Cooling and Serving Preparation
Once baked, let your honey walnut banana bread cool in the pan for about 20 minutes before transferring it to a cooling rack. It’s crucial to let it cool completely before cutting. This allows the flavors to deepen, making every slice enjoyable. You can serve it as is, or with a spread of butter for an extra treat!
Now, you're all set to enjoy a slice of homemade bliss! Who’s ready to indulge in this festive banana bread?
Variations on Honey Walnut Banana Bread
Spiced Honey Walnut Banana Bread
For a warm twist on the classic honey walnut banana bread, add a blend of spices! Incorporate 1 teaspoon each of cinnamon and nutmeg into your dry ingredients for a cozy flavor profile. This addition complements the sweetness of the bananas and honey beautifully. You can also toss in some dried fruits or finely chopped apples for extra moisture and texture.
Chocolate Chip Honey Walnut Banana Bread
If you’re a fan of decadence, consider adding chocolate chips to your honey walnut banana bread! Simply fold in 1 cup of semi-sweet chocolate chips to the batter before baking. The rich flavor of the chocolate complements the nuttiness of the walnuts and the sweetness of the bananas, creating a dessert-like treat that’s perfect for breakfast or an afternoon snack.
Explore these variations to elevate your banana bread game! For more delicious baking ideas, check out resources like Serious Eats or BBC Good Food.
Cooking tips and notes for Honey Walnut Banana Bread
Ensuring perfect texture
To achieve that dreamy texture in your honey walnut banana bread, make sure not to overmix the batter. Mixing too much can lead to a dense loaf instead of the light, moist texture you desire. Stir until you just see the dry ingredients incorporated.
Tips for banana ripeness
When it comes to bananas, ripeness matters! For the best flavor and sweetness, choose bananas that are heavily speckled or almost brown. They not only provide natural sweetness but also ensure a more moist and flavorful bread. If you’re in a pinch, you can speed up ripening by placing bananas in a paper bag at room temperature or giving them a quick roast in the oven.
For more insights on banana ripening, feel free to check out this guide. By following these tips, you’ll assure a deliciously rich loaf every time!
Serving suggestions for Honey Walnut Banana Bread
Perfect pairings for breakfast or snacks
Your honey walnut banana bread shines as a delightful breakfast or snack, especially when served alongside a warm cup of coffee or tea. Try pairing it with creamy Greek yogurt for added protein and a splash of fruit. For something savory, consider a side of turkey bacon or chicken ham—these options will nicely balance the sweetness of the bread. Adding fresh fruit, like berries or sliced apples, enhances the experience and adds a pop of color to your breakfast table.
Elevating your serving presentation
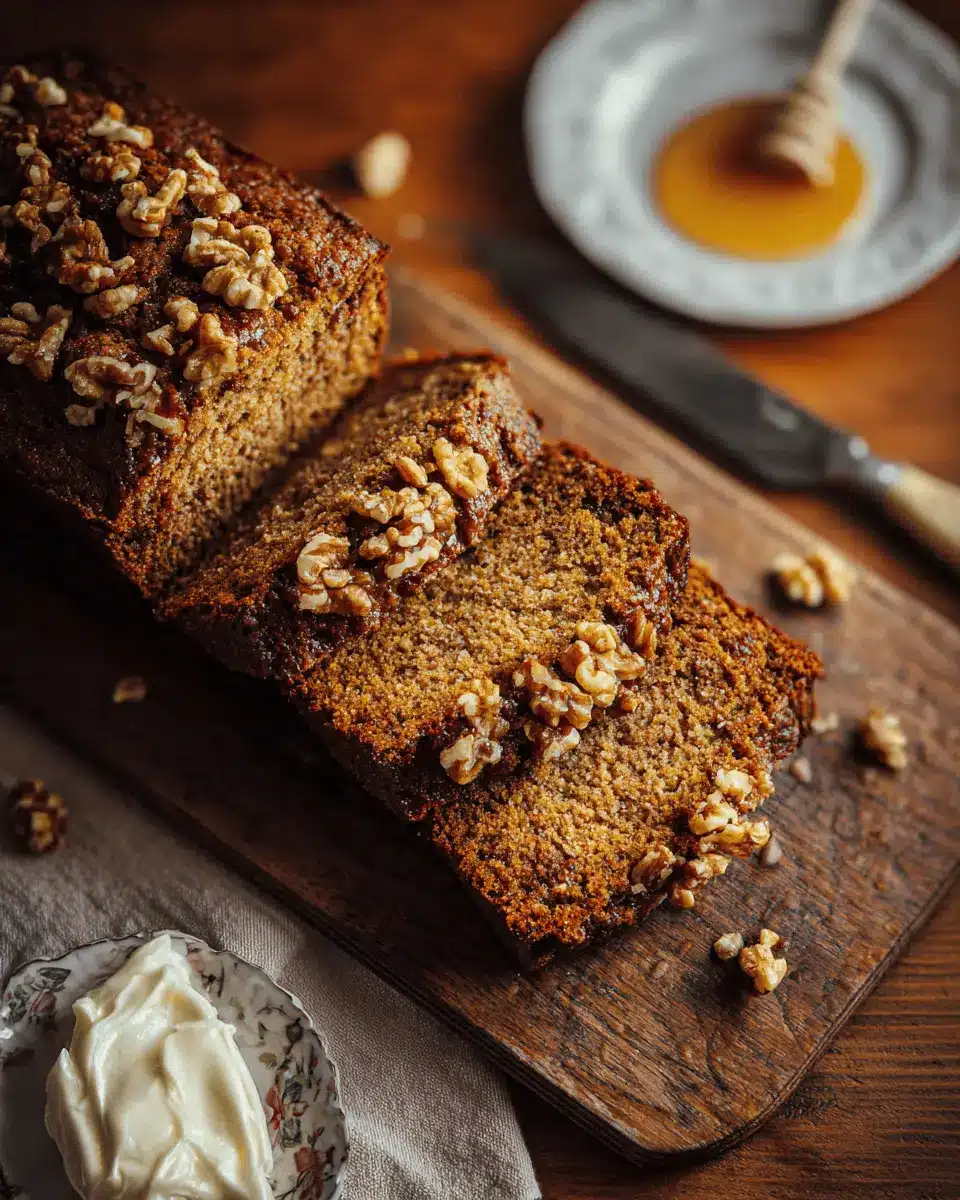
When it comes to presentation, a little effort goes a long way! Slice the bread and place it on a rustic wooden board, garnished with extra walnuts and a drizzle of honey. You could even serve individual slices on charming dessert plates for a more elegant touch. Consider dusting the top with a light sprinkle of powdered sugar for an eye-catching finish. This inviting setup not only makes for a beautiful display but also entices guests to indulge in this delicious treat.
For more tips on presentation, check out The Kitchn for creative ideas!
Time Breakdown for Honey Walnut Banana Bread
Preparation Time
With just 20 minutes of prep work, you’ll be surprisingly close to enjoying this delightful treat. Gather your ingredients, mash those ripe bananas, and mix everything together. Quick and easy!
Baking Time
The actual baking takes about 1 hour, plus a few extra minutes to test for doneness. Remember to cover it with foil halfway through to ensure that topping stays perfectly golden.
Total Time
In just about 1 hour and 20 minutes, you’ll have your delicious Honey Walnut Banana Bread ready to cool. It's the perfect blend of efficiency and indulgence for your day!
For more tips on achieving the perfect loaf, check out resources like King Arthur Baking and Serious Eats.
Nutritional Facts for Honey Walnut Banana Bread
Calories per Serving
Each slice of this delightful honey walnut banana bread packs approximately 395 calories, making it a wholesome choice for breakfast, brunch, or a comforting afternoon snack.
Nutritional Breakdown
Here’s a quick glance at the nutritional profile per serving:
- Carbohydrates: 55g
- Protein: 5g
- Fat: 19g
- Saturated Fat: 2g
- Sugar: 32g
- Fiber: 2g
This satisfyingly sweet loaf offers a balance of nutrients from natural sources, making it a clear contender for one of your go-to treats. You can explore more about the benefits of walnuts and bananas on trusted sites like Healthline and NutritionData. Enjoy a slice of goodness and feel good about your choices!
FAQs about Honey Walnut Banana Bread
Curious about making honey walnut banana bread? Here are some common questions to help you get the most out of your baking experience!
Can I substitute ingredients in the recipe?
Absolutely! Feel free to experiment based on your pantry staples or dietary preferences. For example, you can use whole wheat flour for a nuttier flavor or substitute the avocado oil with melted coconut oil. If you're looking for a vegan option, swap the eggs for flax eggs (1 tablespoon of ground flaxseed mixed with 2.5 tablespoons of water per egg).
How do I store leftover banana bread?
To keep your honey walnut banana bread fresh, store it in an airtight container at room temperature for up to 3 days. If you want to preserve it for longer, follow the freezing instructions below.
Can I freeze honey walnut banana bread?
Yes, you can! Wrap the cooled banana bread tightly in plastic wrap, then place it in a freezer-safe bag. It can be frozen for up to 3 months. Just thaw it overnight in the refrigerator when you're ready to enjoy a slice!
Conclusion on Honey Walnut Banana Bread
In summary, this honey walnut banana bread recipe is a delightful way to elevate your baking game. Whether enjoyed for breakfast or as a tasty snack, it's sure to impress family and friends alike. Remember, allowing it to cool completely enhances the flavors even more. Happy baking!
Honey Walnut Banana Bread
Equipment
- loaf pan
- parchment paper
Ingredients
- 2 cups Unbleached All-Purpose Flour
- 1 teaspoon Baking Soda
- 1 teaspoon Baking Powder
- 0.5 teaspoon Salt
- 1.5 cups Bananas 3 Ripe Bananas
- 2 large Eggs
- 0.75 cups Sugar
- 0.5 cups Avocado Oil
Honey Walnut Topping
- 0.5 cups Honey
- 1 cup Chopped Walnuts
Instructions
Honey Walnut Topping
- In a small bowl, combine Honey and Chopped Walnuts. Side aside.
Banana Loaf
- Preheat the oven to 350°F. Prepare your loaf pan by greasing it with avocado oil and placing a strip of parchment paper about the width of the bottom with enough slack to stick out to make the pan.
- In a large mixing bowl, sift flour, baking soda, baking powder, and salt. Set aside.
- Combine mashed bananas, eggs, sugar, and oil in a medium mixing bowl. Mix well.
- Slowly combine wet ingredients with dry ingredients using a wooden spoon. Mix until just combined with no clumps.
- Pour into prepared loaf pan and tap out any air bubbles.
- Spoon Honey Walnut Mixture over top of the batter.
- Bake on the middle rack. After 30 minutes place a sheet of aluminum foil over the top of the loaf.
- After an hour, use a toothpick or knife to check for doneness. If still wet, leave for another 10 minutes or until the knife comes out clean.
- After the loaf is removed from the oven, allow cooling in the pan for 20 minutes before removing it onto a cooling rack.
- Allow the loaf to cool COMPLETELY before cutting into it. This will allow the loaf to develop more flavour!


Leave a Reply