
Introduction to Banana Pudding Cups
Banana Pudding Cups are a delightful way to satisfy your sweet tooth without spending the entire afternoon in the kitchen. These individually portioned desserts combine creamy banana pudding, fresh banana slices, and crunchy Nilla wafers, making them an irresistible treat. Perfect for young professionals on the go, these cups can be prepared ahead of time and stored in the fridge, providing a quick and easy dessert option after a busy workday.
Why are Banana Pudding Cups the perfect dessert for young professionals?
For young professionals juggling ambitious careers and a vibrant social life, finding the right balance between indulgence and convenience is key. Banana pudding cups fit the bill—they're:
- Effortless to Prepare: With minimal cooking required, you can whip these up in just a few steps.
- Make-Ahead Friendly: Prep a batch over the weekend and enjoy them throughout the week. Just store them in the fridge, and they're good to go!
- Versatile: These cups are perfect for casual gatherings, potlucks, or a simple night in. You can even adjust the ingredients to suit dietary preferences; they're inherently gluten-free and vegetarian.
So, are you ready to treat yourself and impress your friends? Let's get started with this must-try recipe for banana pudding cups! For ideas on gathering essentials, check out this guide on dessert-making tools.
Ingredients for Banana Pudding Cups
Essential ingredients for a delicious banana pudding cup
To create delightful banana pudding cups, you'll need some key ingredients that are simple yet effective in delivering that creamy, dreamy dessert experience:
- 1 box (4.6 ounces) banana pudding mix: This is the heartbeat of your pud and ensures rich flavor.
- Milk: Use the type called for on your pudding box; this helps to achieve the perfect consistency.
- 1 pint of heavy whipping cream: Bringing that luscious, airy texture to the mix is essential.
- ¼ cup powdered sugar: Just a hint of sweetness to balance the creaminess.
- 3 ripe bananas: Opt for bananas that are barely ripe for the best texture.
- 1 box of mini Nilla wafers: These classic cookies are a must-have for that unbeatable crunch.
Optional ingredients to elevate your dessert
Want to take your banana pudding cups to the next level? Consider adding:
- Chocolate shavings or chips: A sprinkle of chocolate can introduce an exciting flavor contrast.
- Vanilla extract: Just a splash can amplify the overall taste.
- Coconut flakes: For a tropical twist, add some unsweetened coconut on top.
- Caramel sauce: Drizzling this on top can create a delicious fusion of flavors.
Experiment with these optional ingredients to make your dessert uniquely yours! If you're curious about achieving the perfect whipped cream, hyperlinked resources, like this guide on how to whip cream perfectly, can offer valuable tips!
Preparing Banana Pudding Cups
Creating banana pudding cups is a delightful experience that not only satisfies your sweet tooth but also brings a sense of nostalgia with every spoonful. Here’s how you can make these delicious treats step by step!
Gather Your Ingredients and Equipment
Before you start cooking, it’s crucial to have everything you need within reach. For our banana pudding cups, you’ll need the following ingredients and equipment:
Ingredients:
- 1 (4.6 ounce) box banana pudding mix (not instant)
- Milk as indicated on the pudding box
- 1 pint heavy whipping cream
- ¼ cup powdered sugar
- 3 barely ripe or slightly underripe bananas, sliced thinly
- 1 box mini Nilla wafers
Equipment:
- 8 clear glasses, jars, or cups (6-8 ounces)
- Electric hand mixer or stand mixer
Make sure you’ve got a comfortable workspace, as you'll likely be mixing and layering these treats for a while!
Prepare the Banana Pudding
Start by preparing the banana pudding according to the package instructions. This usually involves mixing the pudding mix with the specified amount of milk and then stirring until smooth. Once it’s mixed, cover the bowl and place it in the refrigerator for at least four hours, or until set. The chilling time is crucial because it helps the flavors meld beautifully, resulting in that creamy texture we all love.
Whip the Cream to Perfection
While your pudding is setting, it's time to whip the cream. This step is vital for achieving that airy texture that complements the dense pudding. Using your electric mixer, beat the heavy whipping cream until stiff peaks form (about 3 to 5 minutes on medium speed). Then, gently fold in the powdered sugar. This not only sweetens the cream but also adds a bit of stability. It’s essential to be careful here; you want to maintain that light, fluffy consistency! If you're unsure how to whip cream properly, check out this helpful guide.
Layer the Ingredients in Your Cups
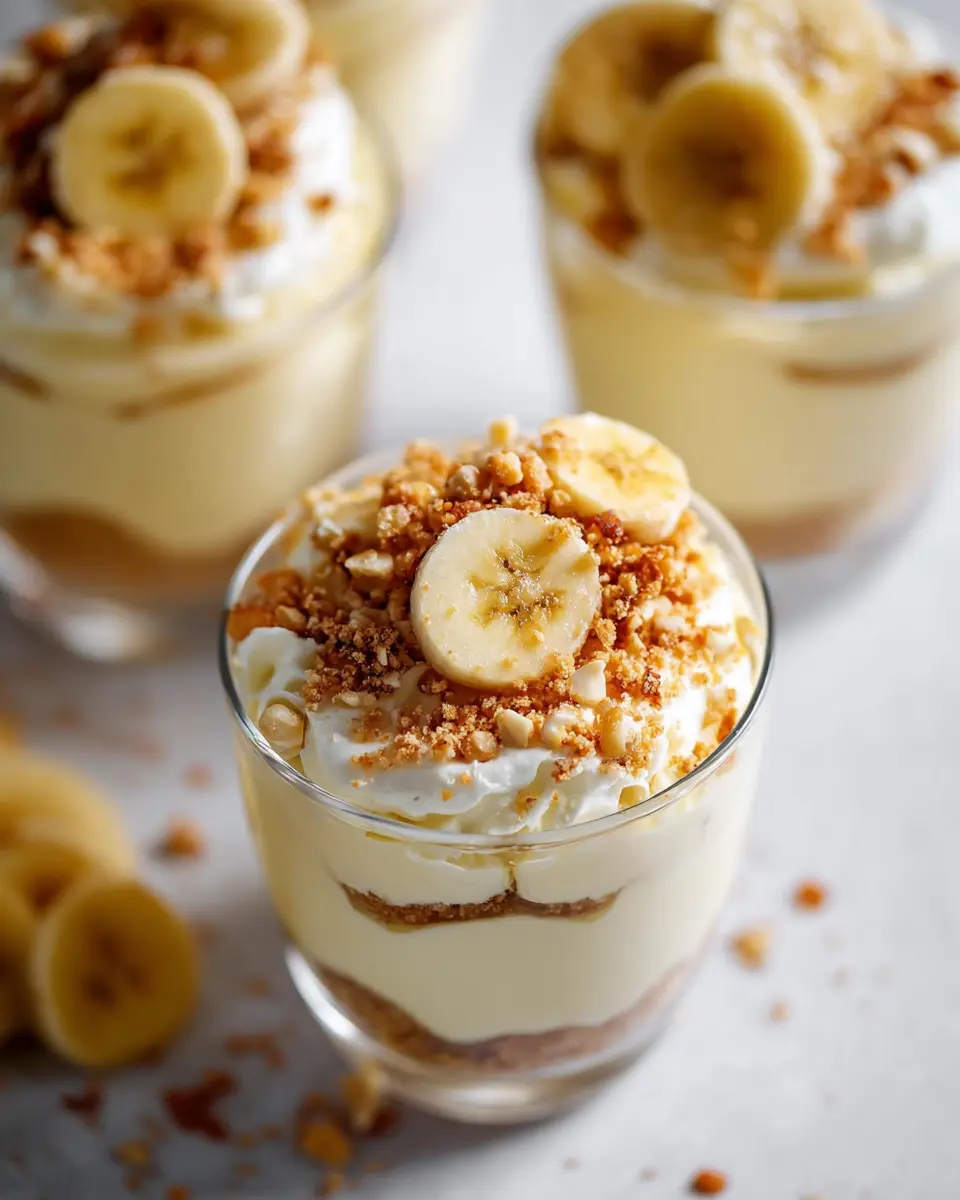
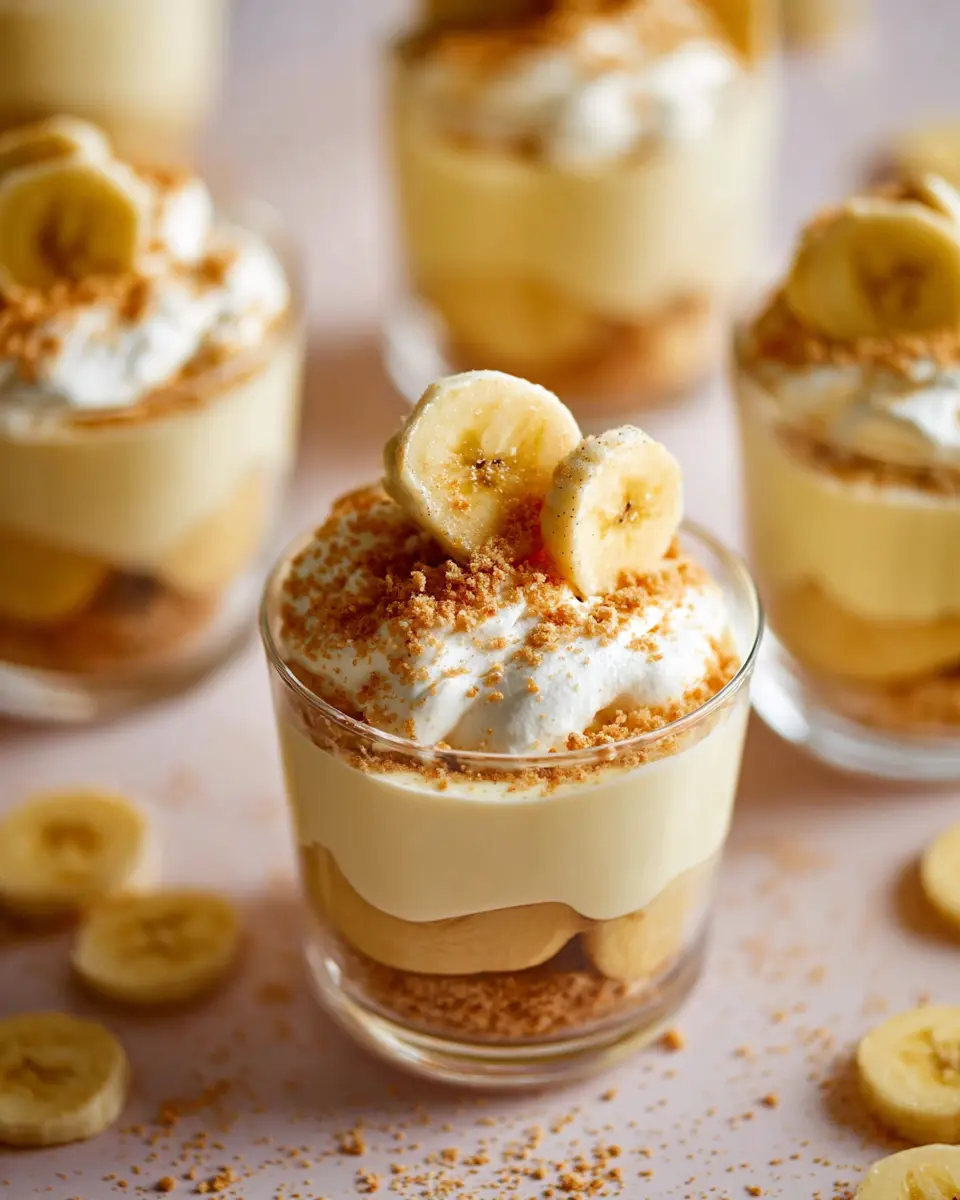
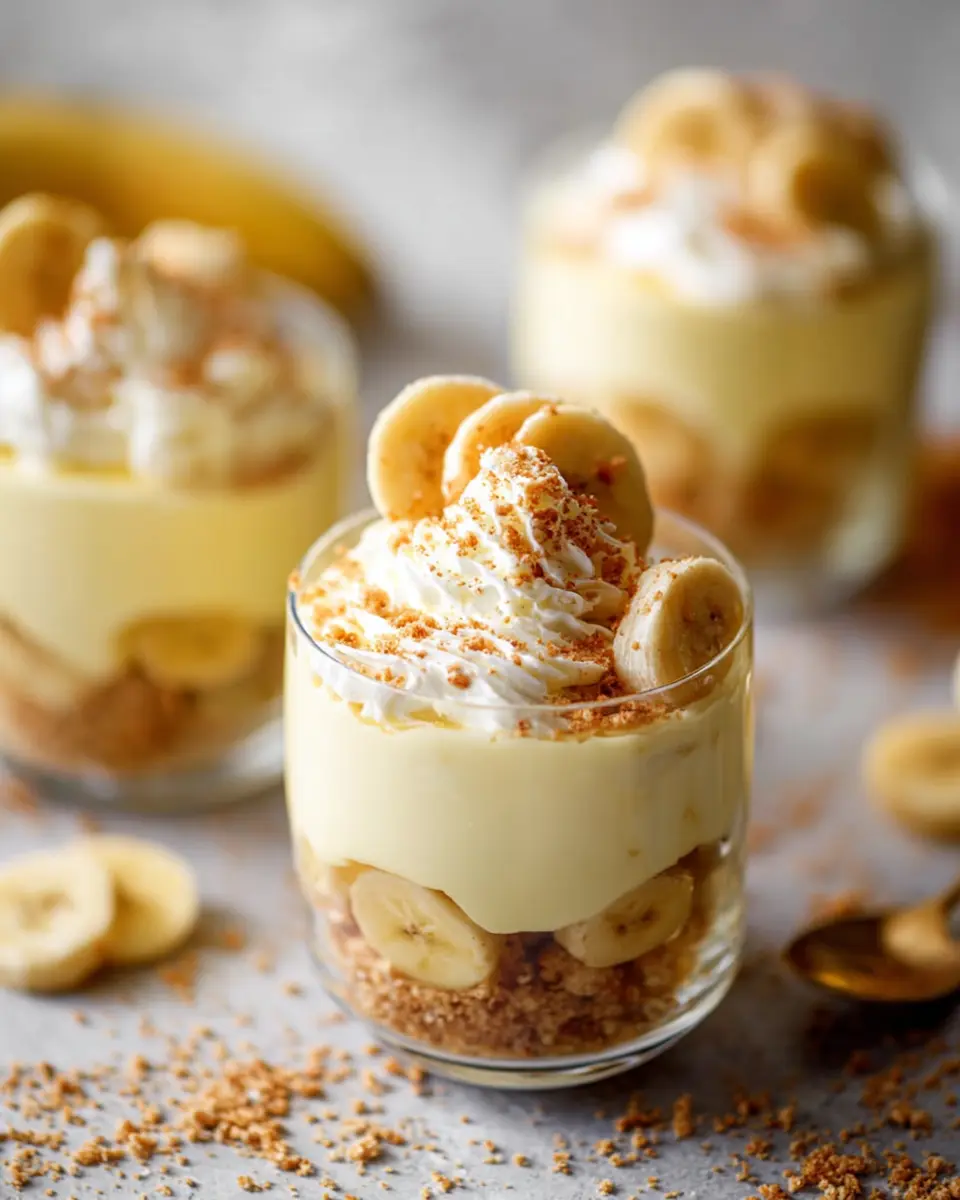
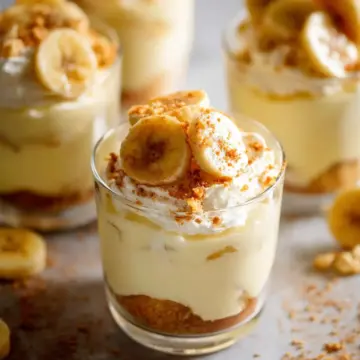
Now comes the fun part! Using your clear glasses, start by adding a layer of the banana pudding—fill each cup about one-third full. Next, add five mini Nilla wafers and followed by five slices of banana. Finally, top it off with another layer of the pudding mixture, filling the glass to the brim. This layering technique not only looks impressive but also ensures each spoonful is packed with flavor!
Chill and Let the Flavors Meld
After assembling your banana pudding cups, cover them with plastic wrap and refrigerate for at least two hours before serving, but you can let them chill longer if you prefer. This wait time is worth it, as it allows the ingredients to meld together beautifully, enhancing the overall flavor. When you’re about to serve, consider garnishing each cup with wafer crumbs or a fresh banana slice for that perfect finishing touch.
Enjoy the process, and soon you’ll be savoring these delightful banana pudding cups!
Variations on Banana Pudding Cups
Banana Pudding Cups with a Twist: Adding Chocolate
Need a little something extra in your banana pudding cups? Try adding chocolate to the mix! Simply fold in some chocolate pudding for a delightful blend of flavors. For an even richer taste, drizzle chocolate syrup between the layers or use crushed chocolate cookies instead of Nilla wafers. This twist creates a dessert that’s both familiar and exciting, making it perfect for chocolate lovers.
Banana Pudding Cups with a Tropical Flair: Incorporating Coconut
Bring a taste of the tropics to your banana pudding cups by incorporating coconut. Use coconut-flavored pudding mix or sprinkle toasted coconut between the layers for a tropical crunch. You can also top them with shredded coconut for a fun garnish. This variation offers a light, refreshing take on the classic dessert and is sure to impress guests. Looking for more inspiration? Check out Simply Recipes for more creative ideas!
Cooking tips and notes for Banana Pudding Cups
Tips for achieving the best texture
To ensure your banana pudding cups have an ultra-creamy texture, use heavy whipping cream that’s chilled before whipping—this helps achieve those perfect stiff peaks. Gently fold the whipped cream into the pudding mix to maintain that light and airy feel. For the best flavor, opt for bananas that are barely ripe; they'll hold their structure without becoming mushy.
Storage notes for optimal flavor retention
To keep your banana pudding cups fresh and delicious, store them covered in the refrigerator. They typically hold well for about three days. I find it's easiest to prepare them a day in advance and keep them on a baking sheet for easy handling. Avoid letting them sit out too long to maintain that coveted creamy texture!
Serving suggestions for Banana Pudding Cups
Ideal occasions for serving
Banana pudding cups are perfect for various gatherings—think birthday parties, casual get-togethers, or even a cozy movie night. They also shine at potlucks or picnics, where their individual servings make sharing a breeze. With their nostalgic flavor, they’re a hit at family reunions or holiday celebrations. Plus, who doesn’t love a little comfort food during those busy work weeks?
Creative presentation tips
For a visually appealing dessert, consider layering your banana pudding cups with different textures. Use clear glasses or mason jars to showcase the beautiful layers of creamy pudding, banana slices, and Nilla wafers. Top each cup with a dollop of whipped cream, a sprinkle of crushed wafers, and a thin banana slice for that extra flair. You can also tie a colorful ribbon around your jars for a festive touch! For more ideas on presentation, check out this article on creative dessert displays.
Time breakdown for Banana Pudding Cups
Preparation time
The prep for these banana pudding cups takes about 10 minutes. That’s just enough time to whip up the pudding and get your layering stations ready!
Chill time
For that perfect creamy texture, let the pudding chill for 4 hours after preparation. Another 2 hours refrigerating the assembled cups ensures they set just right.
Total time
All in all, you’re looking at a total time of 6 hours and 20 minutes, with minimal hands-on work. Perfect for planning ahead when you want to impress your guests with an easy yet delicious dessert!
For more helpful tips and tricks, check out this guide on how to layer desserts for a wow factor.
Nutritional Facts for Banana Pudding Cups
Calories Per Serving
Each delightful serving of these banana pudding cups contains approximately 384 calories. While they might seem indulgent, every spoonful offers a special treat that won't break your calorie bank for the day.
Key Nutritional Highlights
These delicious cups not only satisfy your sweet tooth but also provide some nutritional benefits:
- Carbohydrates: 31g, primarily from the bananas and Nilla wafers, offering a quick source of energy.
- Protein: 5g, mainly from the heavy whipping cream, helping to keep you feeling satisfied.
- Fat: 28g, with 16g of saturated fat, adding to the creamy richness—enjoy these in moderation!
- Cholesterol: 90mg, derived mostly from the dairy ingredients.
- Potassium: 336mg, thanks to the bananas, which are great for muscle function and heart health.
For more detailed dietary guidance, the Mayo Clinic offers extensive insights into how to incorporate treats while maintaining a balanced diet. These banana pudding cups certainly bring that balance to dessert!
The combination of flavors and textures in each bite not only delights the taste buds but can also fit into an overall healthy lifestyle, especially when shared among friends or family. So why wait? Treat yourself and create some memories with this easy recipe!
FAQs about Banana Pudding Cups
Can I make banana pudding cups ahead of time?
Absolutely! In fact, making banana pudding cups the night before allows the flavors to meld beautifully. Just prepare the dessert, layer it in your cups, and keep them covered in the refrigerator. They’re good for about 3 days, so you can easily make them ahead of a gathering!
What type of bananas are best for this recipe?
For the best results, use slightly underripe bananas. They hold their shape well and provide a wonderful texture that balances the creamy pudding. Overripe bananas may become mushy, disrupting the lovely layers of your banana pudding cups.
How can I customize my banana pudding cups?
Feel free to get creative! You might add crushed cookies for extra crunch, a drizzle of caramel, or swap Nilla wafers for another type of cookie. Fresh berries or even a hint of chocolate can elevate your banana pudding cups to a whole new level. Check out this guide on dessert customization for more ideas!
Conclusion on Banana Pudding Cups
The joy of homemade desserts
Making banana pudding cups is not just about satisfying your sweet tooth; it’s an opportunity to create lasting memories with friends and family. Imagine the smiles as you all dig into these delightful treats!
So, why not give this recipe a try? Your taste buds will thank you!
Banana Pudding Cups
Equipment
- 8 clear glasses, jars or cups
- electric hand-held or stand mixer
Ingredients
- 1 box banana pudding mix (not instant) 4.6 ounce
- milk milk that is called for on the box of pudding
- 1 pint heavy whipping cream
- ¼ cup powdered sugar
- 3 bananas barely ripe or slightly underripe, cut into thin slices
- 1 box mini Nilla wafers
Instructions
- Prepare banana pudding according to package directions. Refrigerate for 4 hours or until set.
- Once pudding is set, use an electric hand-held or stand mixer to whip the heavy cream until stiff peaks form. Add the powdered sugar and stir together using a large spoon.
- Gently fold the whipped cream into the banana pudding.
- Use clear individual serving cups, glasses or jars to layer the pudding/whipped cream mixture ⅓ full, then add 5 mini wafers, then 5 thin banana slices, last fill to the top with more of the pudding/whipped cream mixture.
- Cover and refrigerate until ready to serve, at least 2 hours or up to 24 hours.
- Right before serving, garnish the top with some wafer crumbs, a few banana slices, and stand a wafer into the pudding.
Leave a Reply