
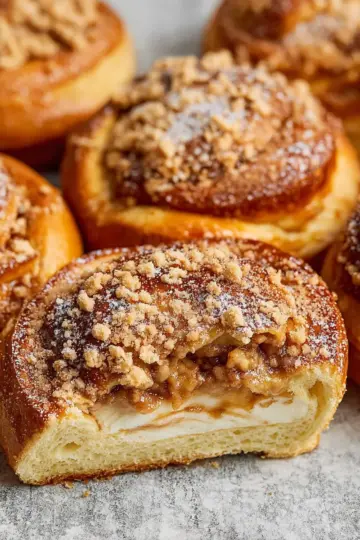
Introduction to Fruity Pebbles Cheesecake Tacos
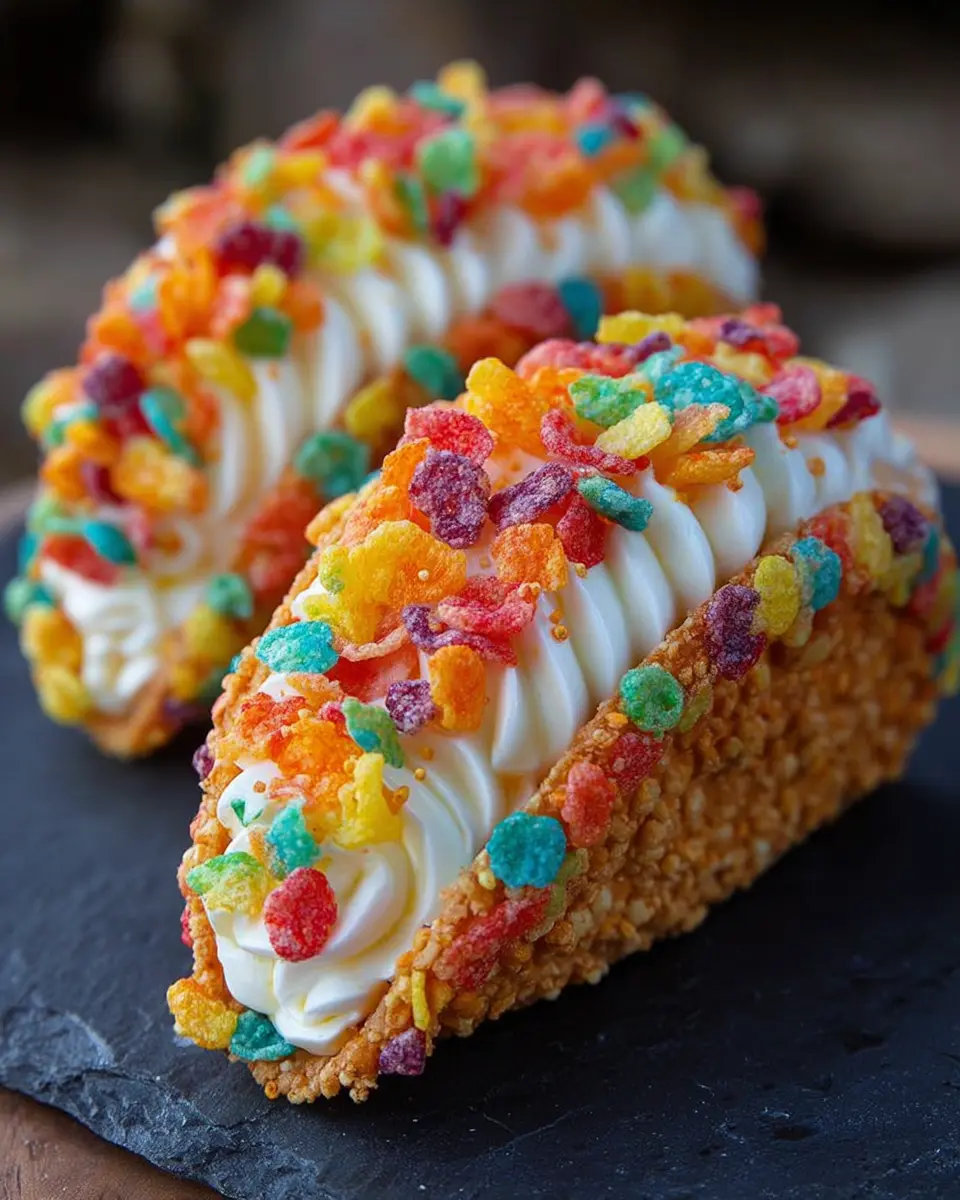
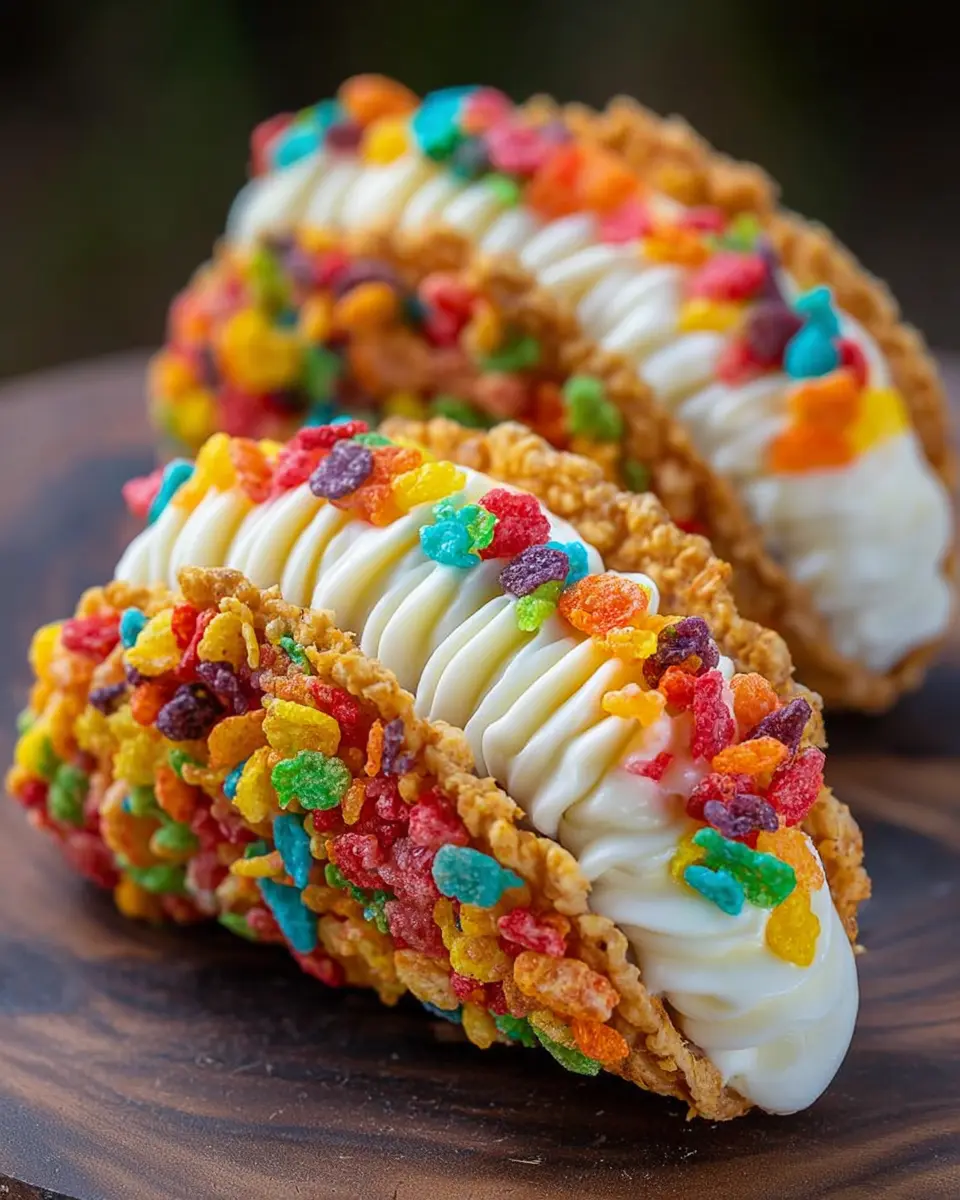
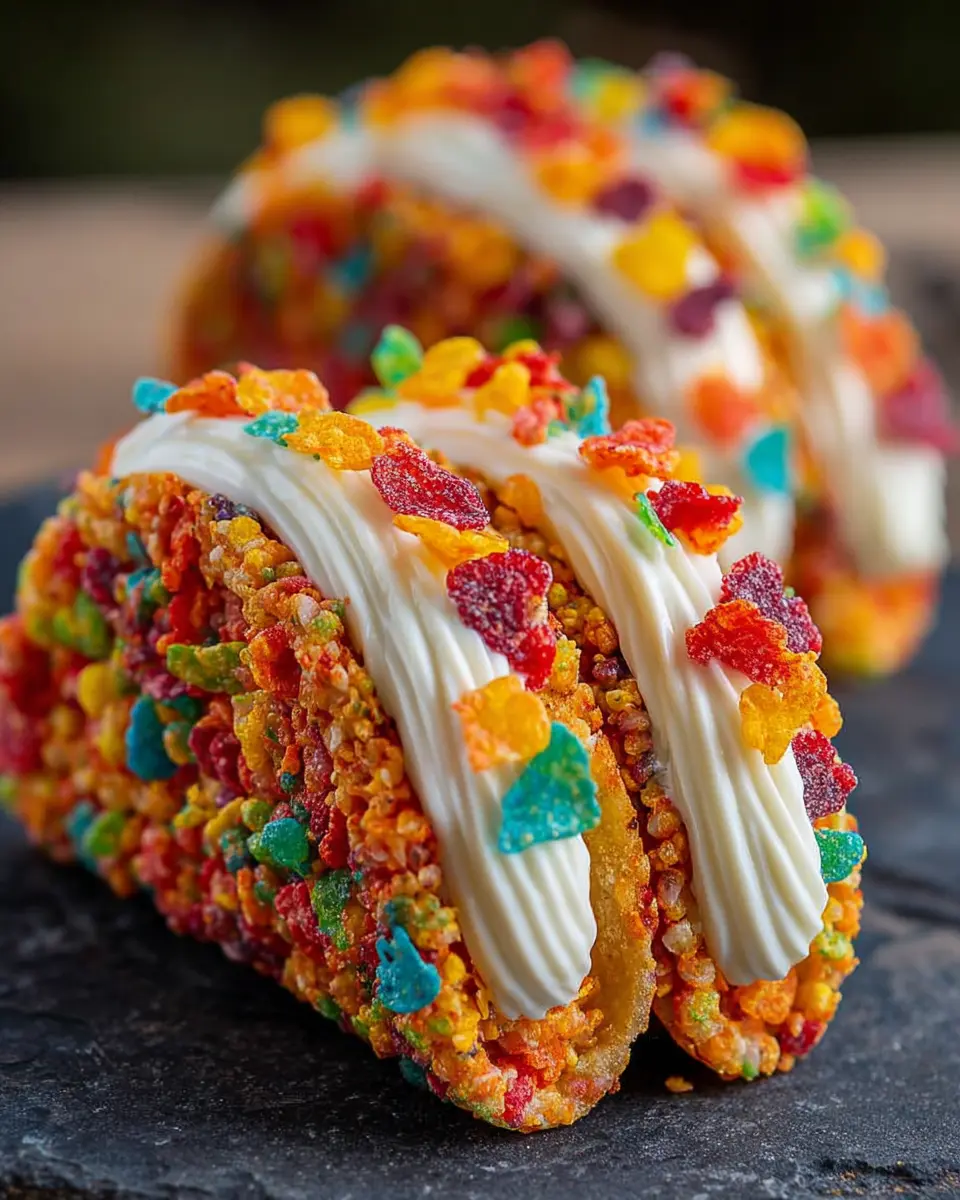
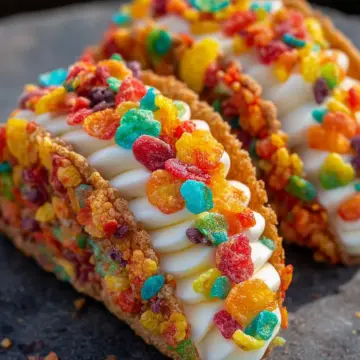
Are you ready to take dessert to a whole new level? Fruity Pebbles cheesecake tacos are not just eye-catching; they bring together a delightful combination of flavors and textures that make them the perfect sweet treat for any occasion. Imagine crunchy, colorful cereal tacos filled with creamy cheesecake filling—it's a playful twist on classic desserts that appeals to both kids and adults alike.
Why are Fruity Pebbles Cheesecake Tacos the perfect dessert?
These whimsical tacos provide an exciting way to enjoy your favorite cheesecake without the fuss of a traditional slice. The vibrant colors of Fruity Pebbles create an inviting presentation that's sure to impress at parties or casual gatherings. Plus, they are easy to make, requiring minimal effort for maximum wow-factor!
Perfect for any occasion, these tacos are a fantastic choice for birthday parties, summer barbecues, or simply as a fun dessert for a cozy night in. With just a handful of ingredients and a bit of creativity, you can whip up a batch that’s not only delicious but also visually stunning. After all, as a friend once told me, "Dessert is the happy ending to any meal!" So why not make it memorable? Check out more dessert treats here for inspiration!
Ingredients for Fruity Pebbles Cheesecake Tacos
Creating your delightful fruity pebbles cheesecake tacos is all about selecting the right ingredients. Let’s break it down:
Essential Ingredients for the Shell
For the shells, you'll need:
- 3 cups fruity cereal: This is the star ingredient that gives your tacos that nostalgic flavor and colorful appearance.
- ½ cup unsalted butter, melted: This helps to bind your cereal together, making for a crispy yet chewy shell.
Must-Have Ingredients for the Filling
For a creamy, dreamy filling, you’ll want:
- 8 oz cream cheese, softened: A rich base that provides that luscious cheesecake texture.
- ½ cup powdered sugar, sifted: This sweetens the mix just right without being overly sugary.
- 1 teaspoon pure vanilla extract: Adds depth and enhances the overall flavor.
- 1 cup whipped cream: Lightens up the filling, creating an airy texture that melts in your mouth.
Optional Garnishes to Elevate Your Tacos
Don’t forget to dress up your tacos! Consider these optional toppings:
- Additional fruity cereal: A sprinkle for crunch and color.
- Fresh fruit: Strawberries or blueberries can add a delightful freshness.
- Drizzle of chocolate syrup: For that extra decadent touch.
Feel free to experiment with these options to make your fruity pebbles cheesecake tacos truly your own!
Preparing Fruity Pebbles Cheesecake Tacos
Getting ready to whip up fruity pebbles cheesecake tacos? Excellent choice! These delightful dessert tacos combine the nostalgic taste of childhood cereal with a rich, creamy cheesecake filling, creating a treat that is sure to be a hit at any gathering. Let’s dive right into the preparation process so you can impress your friends and family!
Step 1: Gather Your Ingredients
First things first, let's get organized! Here’s what you’ll need for this fun dessert:
-
For the taco shells:
-
3 cups fruity cereal
-
½ cup unsalted butter, melted
-
For the cheesecake filling:
-
8 oz cream cheese, softened
-
½ cup powdered sugar, sifted
-
1 teaspoon pure vanilla extract
-
1 cup whipped cream
-
For the garnish:
-
Additional fruity cereal for that extra crunch
Gather these ingredients and get your tools ready: a mixing bowl, hand mixer, spatula, and small taco molds or muffin tins.
Step 2: Create the Crunchy Taco Shells
Now that you have your ingredients, it's time to create those irresistible taco shells. In a mixing bowl, combine the fruity cereal and melted butter, stirring well until each piece of cereal is thoroughly coated.
Next, take your taco molds or muffin tins and press the cereal mixture firmly into these shapes. Make sure to compact it tightly so the shells hold their form—this step is crucial for a successful taco experience! Once you’ve shaped all the shells, pop them in the fridge for at least 30 minutes to set.
Step 3: Whip Up the Creamy Cheesecake Filling
While your shells are firming up, it’s the perfect time to prepare the cheesecake filling. Using a hand mixer, beat the softened cream cheese in a mixing bowl until it becomes light and fluffy. Gradually incorporate the sifted powdered sugar and vanilla extract, mixing until smooth and creamy.
Finally, fold in the whipped cream gently with a spatula. This technique helps retain that airy texture, crucial for a delightful mouthfeel!
Step 4: Assemble the Cheesecake Tacos
Once your taco shells have chilled and are ready, it’s time for the fun part—assembly! Generously spoon the cheesecake filling into each taco shell. Don’t be shy; the more filling, the better!
Finish off by sprinkling additional fruity cereal on top for that colorful, crunchy garnish.
Step 5: Chill and Serve Your Delicious Creation
For optimal texture, you can serve your fruity pebbles cheesecake tacos immediately, or chill them for a little longer if you prefer a firmer filling. They make for a delightful presentation that is sure to wow your guests.
These are more than just tacos; they’re a nostalgia trip wrapped in a delicious dessert! Enjoy your creation, and don’t forget to share this fun twist on a classic with your friends and family. For more delicious dessert ideas, check out Food Network for tons of inspiration!
Variations on Fruity Pebbles Cheesecake Tacos
Chocolate Chip Cheesecake Filling
For a unique spin on fruity pebbles cheesecake tacos, consider adding chocolate chips to your cheesecake filling. Simply fold in a half-cup of mini chocolate chips into the cream cheese mixture for a delightful contrast to the fruity flavors. This adds a rich, gooey layer of chocolatey goodness that enhances every bite.
Seasonal Fruit Toppings for a Fresh Twist
Want to brighten your fruity pebbles cheesecake tacos? Top them with seasonal fruits! Try strawberries, blueberries, or kiwi slices during the warmer months, and figs or pomegranates in the fall. This not only adds vibrant color but also introduces a refreshing, natural sweetness that perfectly balances the creamy cheesecake filling. For more topping ideas, you can check out this great resource on seasonal fruits.
Cooking tips and notes for Fruity Pebbles Cheesecake Tacos
Best ways to achieve the perfect shell texture
Achieving the ideal shell for your fruity pebbles cheesecake tacos is essential for that crunchy experience. Here are a few tips:
-
Press firmly: When molding your cereal mixture, make sure to compact it tightly into the molds. This will help the shells hold shape during baking and prevent crumbling.
-
Chill before filling: Allow the shells to chill in the refrigerator for at least 30 minutes. Chilling helps them set up nicely, creating a delicious crunch as you bite into your taco.
-
Bake appropriately: Keep an eye on them while baking! Over-baking can lead to a tough texture. Aim for a golden-brown finish for the best results.
For more insights on creating delightful desserts, check out this article on perfecting your cheesecake techniques!
Serving suggestions for Fruity Pebbles Cheesecake Tacos
When it comes to serving Fruity Pebbles Cheesecake Tacos, creativity is key! Elevate your dessert presentation with these fun ideas:
-
Colorful Plates: Serve the tacos on vibrant, colorful plates to make them pop. A white plate can also work wonders, highlighting the colorful toppings.
-
Toppings Bar: Create a toppings bar with extra Fruity Pebbles, whipped cream, and fresh fruit like strawberries or blueberries. This adds an interactive element for guests.
-
Mini Dessert Tacos: Consider making mini versions for easier snacking. Perfect for parties!
-
Festive Garnishes: Use edible glitter or sprinkles for an eye-catching finish.
For more delightful serving suggestions, check out this article on fun dessert ideas!
Time Breakdown for Fruity Pebbles Cheesecake Tacos
Preparation Time
Get ready to whip up these delightful fruity pebbles cheesecake tacos in just 20 minutes! That’s plenty of time to gather ingredients and mix your creamy filling while your taco shells chill.
Cooking Time
Although there’s no traditional cooking involved, you’ll need 30 minutes to let those cereal shells set in the refrigerator. This step is crucial for achieving that perfect crunch.
Total Time
In only 50 minutes, you’ll have a colorful, tasty treat that’s bound to impress! Perfect for a quick dessert with friends or a fun weekend family project. Get started and savor the delightful blend of textures and flavors!
For more creative dessert ideas, check out this post on colorful cupcakes or whip up some easy fruit parfaits!
Nutritional Facts for Fruity Pebbles Cheesecake Tacos
When indulging in these delightful fruity pebbles cheesecake tacos, it’s useful to know what you’re enjoying. Here are the nutritional highlights:
Calories per Serving
Each taco is approximately 320 calories, making it a sweet treat to savor without too much guilt.
Total Fat and Carbohydrates
With 18 g of total fat and 42 g of carbohydrates per serving, these tacos are rich in flavor and texture. Just remember to enjoy them in moderation for a balanced diet!
For more insights on healthier dessert alternatives, check out resources from Healthline and Eat This, Not That.
FAQs about Fruity Pebbles Cheesecake Tacos
Can I make these tacos ahead of time?
Absolutely! You can prepare the Fruity Pebbles Cheesecake Tacos a day in advance, which is perfect for parties or get-togethers. Just make the cereal shells and cheesecake filling, assemble the tacos, and refrigerate them until you’re ready to serve. Just a quick tip: hold off on adding toppings until just before indulging to keep them crunchy!
What can I use as an alternative to cream cheese?
If you’re looking for a cream cheese alternative for your Fruity Pebbles Cheesecake Tacos, consider using Greek yogurt or a dairy-free option like cashew cheese. Both will provide a satisfying creaminess while catering to different dietary needs. Experimenting with flavors can also add a unique twist!
How do I store leftovers?
If you happen to have any leftover tacos (which is rare!), store them in an airtight container in the refrigerator. They’ll keep well for about 2-3 days. Just remember that the cereal shells may lose some crunch, so it’s best to enjoy them fresh whenever possible!
For more delicious dessert ideas, check out Food Network.
Conclusion on Fruity Pebbles Cheesecake Tacos
Fruity Pebbles cheesecake tacos are not just a dessert; they’re a delightful experience! With their crunchy texture and creamy filling, they make for a fun treat to impress friends at gatherings. Don’t hesitate to personalize your toppings; get creative and enjoy every colorful bite!
For more dessert inspiration, visit Big Girls Small Kitchen for fantastic recipes that can elevate your next gathering!
Fruity Pebbles Cheesecake Tacos
Equipment
- Mixing Bowl
- hand mixer
- spatula
- Small taco molds or muffin tins
Ingredients
Shells
- 3 cups fruity cereal
- ½ cup unsalted butter, melted
Filling
- 8 oz cream cheese, softened
- ½ cup powdered sugar, sifted
- 1 teaspoon pure vanilla extract
- 1 cup whipped cream
Garnish
- additional fruity cereal
Instructions
Preparation
- Combine the fruity cereal and melted butter in a mixing bowl. Stir thoroughly until every piece is evenly coated.
- Press the cereal mixture firmly into small taco-shaped molds or muffin tins. Compact tightly and chill in the refrigerator for at least 30 minutes.
- Using a hand mixer, beat the cream cheese until light and fluffy. Gradually add powdered sugar and vanilla extract, blending until smooth.
- Gently fold whipped cream into the cream cheese mixture, using a spatula to maintain a light texture.
- Once the cereal shells are firm, spoon the cheesecake filling into each shell generously.
- Sprinkle additional fruity cereal over the filled shells. Serve immediately or chill for a firmer texture.
Leave a Reply