
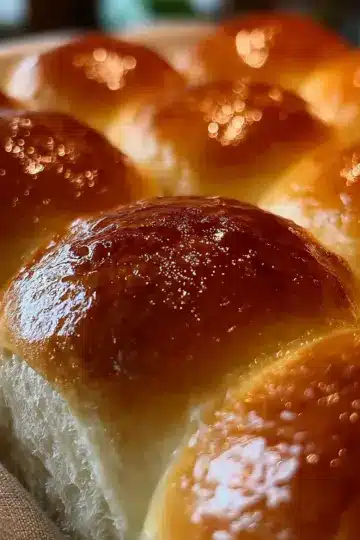
Introduction to Classic Dinner Rolls
There's something magical about classic dinner rolls that makes them an essential addition to any meal. Whether it's a Sunday family gathering or a cozy weeknight dinner, freshly baked rolls can elevate the experience from ordinary to extraordinary. But why should you opt for homemade rolls instead of their store-bought counterparts? It’s simple: the taste, aroma, and texture of freshly baked rolls are unbeatable!
Homemade rolls are superior because you control the ingredients. By using quality all-purpose flour and rapid rise instant yeast, you guarantee freshness and flavor that store-bought options just can’t match. Plus, you'll be amazed at how satisfying it is to knead the dough and watch it rise! Did you know that according to the American Institute of Baking, nearly 60% of consumers prefer fresh bread over packaged options?
So, next time you plan a meal, consider making your own classic dinner rolls. Not only do they complement a variety of dishes—from roasted vegetables to Turkey Bacon—they also bring a warm, comforting feeling to any table. Ready to give it a try? Let’s dive into the recipe that will have your friends and family raving!
For more tips on bread making, visit King Arthur Baking's website for expert guidance.
Ingredients for Classic Dinner Rolls
When it comes to baking classic dinner rolls, having the right ingredients is essential for achieving that perfect fluffy texture and irresistible flavor. Here’s what you’ll need:
Main Ingredients
- 4-5 cups all-purpose flour: The foundation of your rolls, providing structure.
- 2 tablespoons rapid-rise instant yeast: This helps the dough rise faster, giving you soft and airy rolls.
- ⅓ cup granulated sugar: Sweetens the dough and adds a hint of richness.
- 1 teaspoon salt: Balances flavors and strengthens the gluten structure.
- 1½ cups warm milk (around 110°F): Hydrates the dough and activates the yeast.
- 5 tablespoons butter, softened: Adds moisture and a delightful buttery taste.
- 1 egg, room temperature: Enriches the dough and helps with binding.
- 2 tablespoons melted butter for brushing: A finishing touch that adds shine and extra flavor.
These components are the building blocks of your classic dinner rolls, making them a perfect addition to any meal. Are you ready to dive into the world of bread-making? You might just find it's easier than you think! For more tips on using yeast, check out this guide on Baker's Percentage.
Step-by-Step Preparation of Classic Dinner Rolls
Making classic dinner rolls is an activity that not only fills your kitchen with delightful aromas but also creates the perfect complement to any meal. Follow these simple steps to master this beloved recipe.
Gather Your Ingredients
Before diving in, make sure you have everything on hand. Here’s what you'll need:
- 4-5 cups of all-purpose flour
- 2 tablespoons of rapid-rise instant yeast
- ⅓ cup of granulated sugar
- 1 teaspoon of salt
- 1½ cups of warm milk (around 110 degrees)
- 5 tablespoons of softened butter
- 1 room temperature egg
- 2 tablespoons of melted butter for brushing
Feel free to check out this guide on baking essentials for more insights into quality ingredients.
Mix the Dough
Start by combining 3 cups of flour, yeast, sugar, salt, warm milk, butter, and the egg in your stand mixer. Attach the dough hook and mix at the lowest speed until the flour is incorporated—don’t forget to scrape down the sides! Then, increase the speed to medium and beat for about 2 minutes.
Once that’s done, gradually add in another 1 cup of flour (½ cup increments) while mixing until a soft, slightly sticky ball of dough forms. It’s during this step that you’ll feel the magic of fresh dough start to happen.
Knead and Let It Rise
Now, transfer your dough to a lightly greased bowl, cover it with a towel or plastic wrap, and let it rise at room temperature for about 30 minutes. This is where patience pays off!
After 30 minutes, gently deflate the dough by punching it down lightly. This action not only reduces air bubbles but also helps in achieving fluffy dinner rolls later on.
Shape the Rolls
Pinch off pieces of the dough to form about 24 rolls—aim for similar size and weigh them if you can (about 2 ounces each). Roll them into smooth balls and place them on a greased baking sheet or in a 9x13 baking dish.
Second Rise and Preheating
Cover your shaped rolls with a towel and let them rise again at room temperature for another 30 minutes. In the meantime, preheat your oven to 375 degrees. This second rise is crucial for achieving that airy texture we all love in classic dinner rolls.
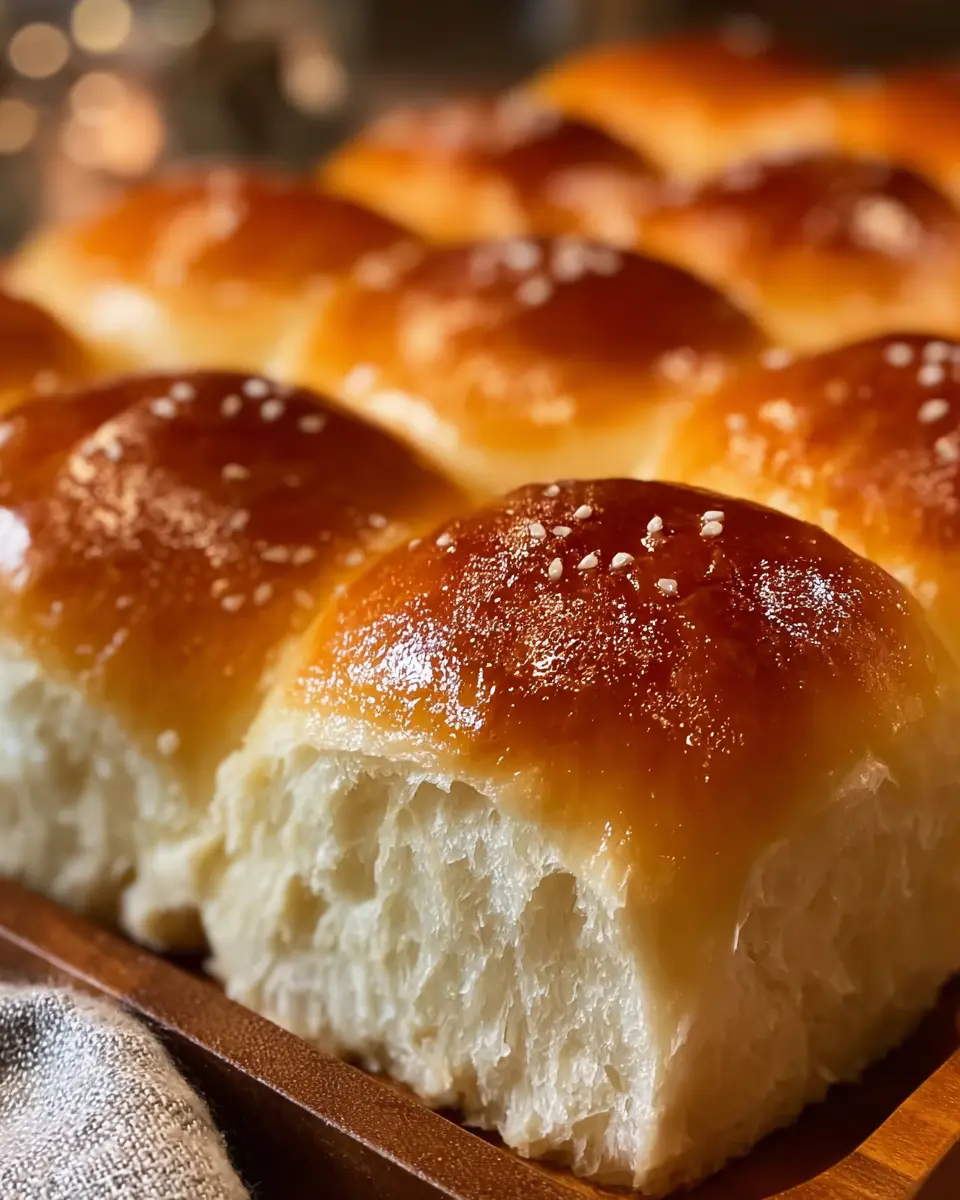
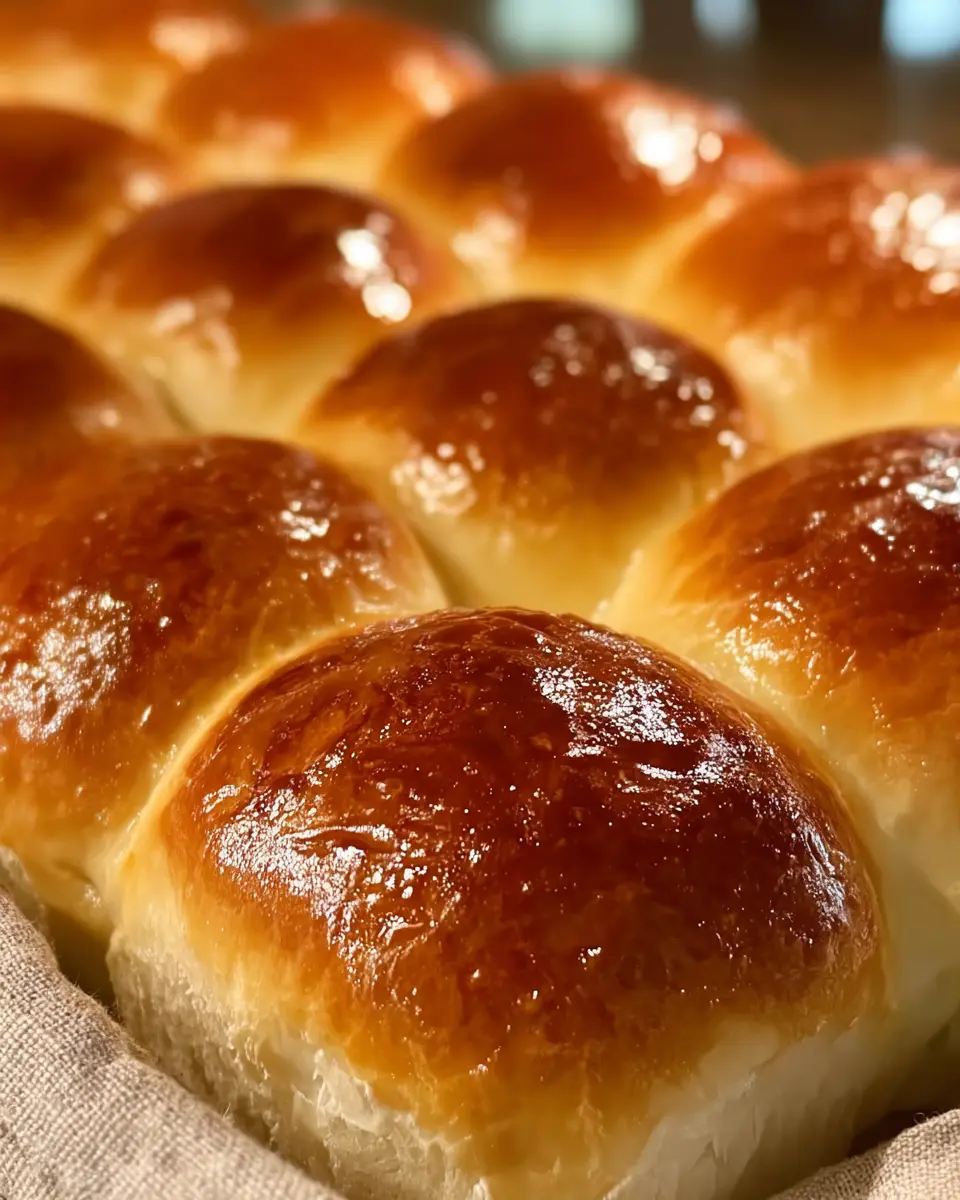
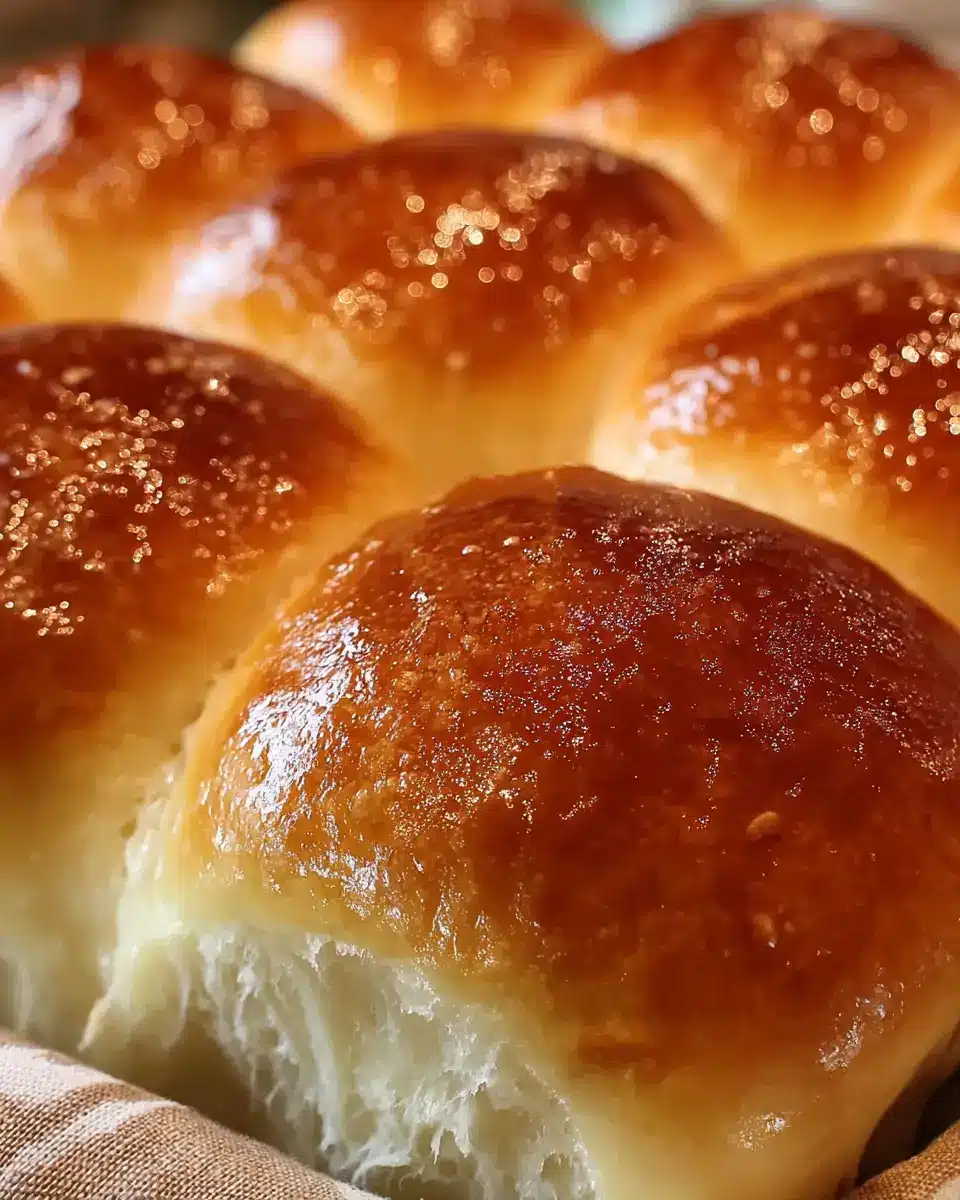
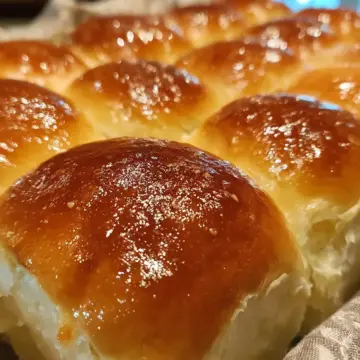
Bake the Classic Dinner Rolls
When the rolls have risen nicely, pop them into the oven and bake for about 12 to 15 minutes, or until they are golden brown. If you notice them getting too brown too quickly, just tent them with aluminum foil to protect their perfect color.
Once out of the oven, brush the rolls with melted butter while they’re still hot. They are best served immediately, but if you have leftovers, store cooled rolls in a plastic bag for up to 3 days.
Remember, every roll you make tells a story of warmth, comfort, and home. Enjoy your classic dinner rolls and the delightful conversations that accompany them!
Variations on Classic Dinner Rolls
Herb-infused classic dinner rolls
Elevate your classic dinner rolls by incorporating fresh herbs like rosemary, thyme, or parsley into the dough. Simply add about 2 tablespoons of finely chopped herbs when mixing the flour. This slight tweak adds an aromatic flavor that complements any meal beautifully, making your rolls the star of the table!
Whole wheat classic dinner rolls
For a healthier twist, swap half of the all-purpose flour for whole wheat flour. This variation gives your classic dinner rolls a nutty flavor and increases their nutritional value, making them a great choice for those looking to add more fiber to their diet. Keep the additional flour handy — you may need it to maintain that light and airy texture!
Explore more variations on rolls at sites like Serious Eats for inspiration!
Cooking Tips and Notes for Classic Dinner Rolls
Making classic dinner rolls can seem daunting, but with a few simple tips, you’ll turn out bakery-style rolls at home.
- Knead to Perfection: The dough should feel soft and slightly sticky; this gives your rolls that melt-in-your-mouth texture.
- Rise Time Matters: Make sure to let your dough rise adequately. If your kitchen is cool, consider placing it in a warm spot, like near an oven.
- Size Consistency: When shaping your rolls, use a kitchen scale for even sizes. This ensures they all bake perfectly.
- Flavor Boost: For a twist, add herbs or garlic into the melted butter before brushing it onto your rolls.
For a deeper dive into fermentation, check out this article on how yeast works for baking. Enjoy your baking adventure!
Serving Suggestions for Classic Dinner Rolls
When it comes to enjoying classic dinner rolls, the possibilities are endless! These fluffy delights complement any meal perfectly. Here are some creative serving suggestions:
- Spreadable Bliss: Serve warm, brushed with melted butter or a dollop of flavored cream cheese. Think herbs and garlic for an extra punch.
- Perfect Pairings: Match your classic dinner rolls with hearty soups, stews, or salads. They’re perfect for scooping, making every bite delicious.
- Transform into Sliders: Slice the rolls and fill with roasted turkey bacon, chicken ham, or grilled veggies for a quick and tasty slider option.
- Sweet Treats: Turn them into dessert! Think about a cinnamon-sugar topping or a drizzle of honey for a sweet end to your meal.
These suggestions not only enhance your meal but also make the roll experience unforgettable!
Time Breakdown for Classic Dinner Rolls
Preparation time
Gathering ingredients and mixing the dough will take about 15 minutes. This initial step sets the stage for your delightful classic dinner rolls.
Rising time
The dough needs to rise twice, each for 30 minutes. This patiently allows the flavors to develop while ensuring a light, fluffy texture.
Baking time
Pop those rolls into a preheated oven for 12 to 15 minutes. Watch them turn golden brown as they transform into the comforting classic dinner rolls we all love.
Total time
In total, expect to spend around 1 hour and a half in the kitchen. A small investment for a fresh batch of rolls that will impress your family and friends!
For more tips on perfecting your rolling technique, check out resources like Serious Eats or King Arthur Baking. They provide excellent insights into baking science and methods that can elevate your bread-making game!
Nutritional Facts for Classic Dinner Rolls
When enjoying homemade classic dinner rolls, it’s useful to know their nutritional highlights. Here’s a quick overview:
Calories
Each roll contains roughly 130 calories, making them a delightful addition to any meal without being overly indulgent.
Protein
With about 4 grams of protein per roll, these dinner rolls help provide some essential building blocks for your body, complementing your meal beautifully.
Sodium
You can expect around 200 mg of sodium in each roll, so they remain a reasonable option for those watching their salt intake.
For a deeper dive into the nutrition of your favorite foods and how they fit into a balanced diet, you can check out resources like the USDA FoodData Central and Nutrition.gov. These tools can help you stay informed and make healthier choices, whether dining in or out!
FAQ about Classic Dinner Rolls
Why are my dinner rolls dense?
If your classic dinner rolls turned out dense, it might be due to a few common missteps. First, make sure your yeast is fresh; expired yeast can lead to under-risen rolls. Additionally, be cautious not to add too much flour—aim for a dough that's slightly sticky. Over-kneading can also result in dense rolls; mix just until the dough is smooth. Finally, ensure that you've allowed enough time for both rises, as this crucial step helps develop texture.
Can I prepare the dough in advance?
Absolutely! You can prepare the dough up to the second rise. Simply cover it and refrigerate overnight. When you’re ready to bake, pull the dough out an hour before baking to let it come to room temperature. This way, you can enjoy fresh classic dinner rolls without the last-minute fuss!
How should I store leftover dinner rolls?
To keep your classic dinner rolls fresh, store them in an airtight container at room temperature for up to four days. If you want to enjoy them later, you can freeze them for up to three months. Just wrap them well in plastic wrap, then foil, or place them in a freezer-safe bag. For tips on freezing bread, check out King Arthur Baking's advice.
Conclusion on Classic Dinner Rolls
In wrapping up your journey with these classic dinner rolls, you've unlocked the secret to creating soft, fluffy delights perfect for any meal. Whether it's a family dinner or festive gathering, these rolls will impress. Enjoy experimenting and making memories — savor each bite! For more baking inspiration, check out King Arthur Baking for expert tips and recipes.
Classic dinner rolls
Equipment
- Stand Mixer
- baking sheet
Ingredients
Main ingredients
- 4-5 cups all purpose flour
- 2 tablespoons rapid rise instant yeast
- ⅓ cup granulated sugar
- 1 teaspoon salt
- 1½ cups warm milk around 110 degrees
- 5 tablespoons butter softened
- 1 large egg room temperature
- 2 tablespoons melted butter for brushing
Instructions
Preparation Steps
- Combine 3 cups of flour, yeast, sugar, salt, warm milk, butter, and egg in the bowl of a stand mixer.
- Attach the dough hook and turn the mixer on to the lowest speed and mix until flour is incorporated, scraping down the sides of the bowl as necessary.
- Increase speed to medium and beat for 2 minutes.
- Add ½ cup flour and blend with the dough hook until incorporated. And another ½ cup flour and repeat, mixing at medium speed for another 2 minutes until a ball of dough is formed.
- Add additional flour as necessary. The dough should be slightly sticky and soft and pulling away from the edge of the bowl.
- Transfer the dough to a lightly greased bowl and cover with a towel or plastic wrap. Let rise for 30 minutes at room temperature.
- Remove the towel or plastic wrap and deflate the dough by punching down lightly. Pinch off pieces of the dough and form 24 rolls.
- Transfer the rolls to a lightly greased quarter baking sheet or 9 x 13 baking dish. Cover with a towel or plastic wrap and let rise for an additional 30 minutes at room temperature.
- Preheat oven to 375 degrees. Bake the rolls for 12 to 15 minutes or until golden brown and cooked through.
- Remove rolls and brush hot rolls with the melted butter. Serve immediately or store cooled rolls in a plastic bag for up to 3 days.


Leave a Reply